KinkyCrafter 20080515 – Portable suspension frame
Warning: Suspension of any kind is inherently dangerous, and should not be attempted by anyone without proper training and supervision, and equipment used should be thoroughly inspected and tested prior to use.
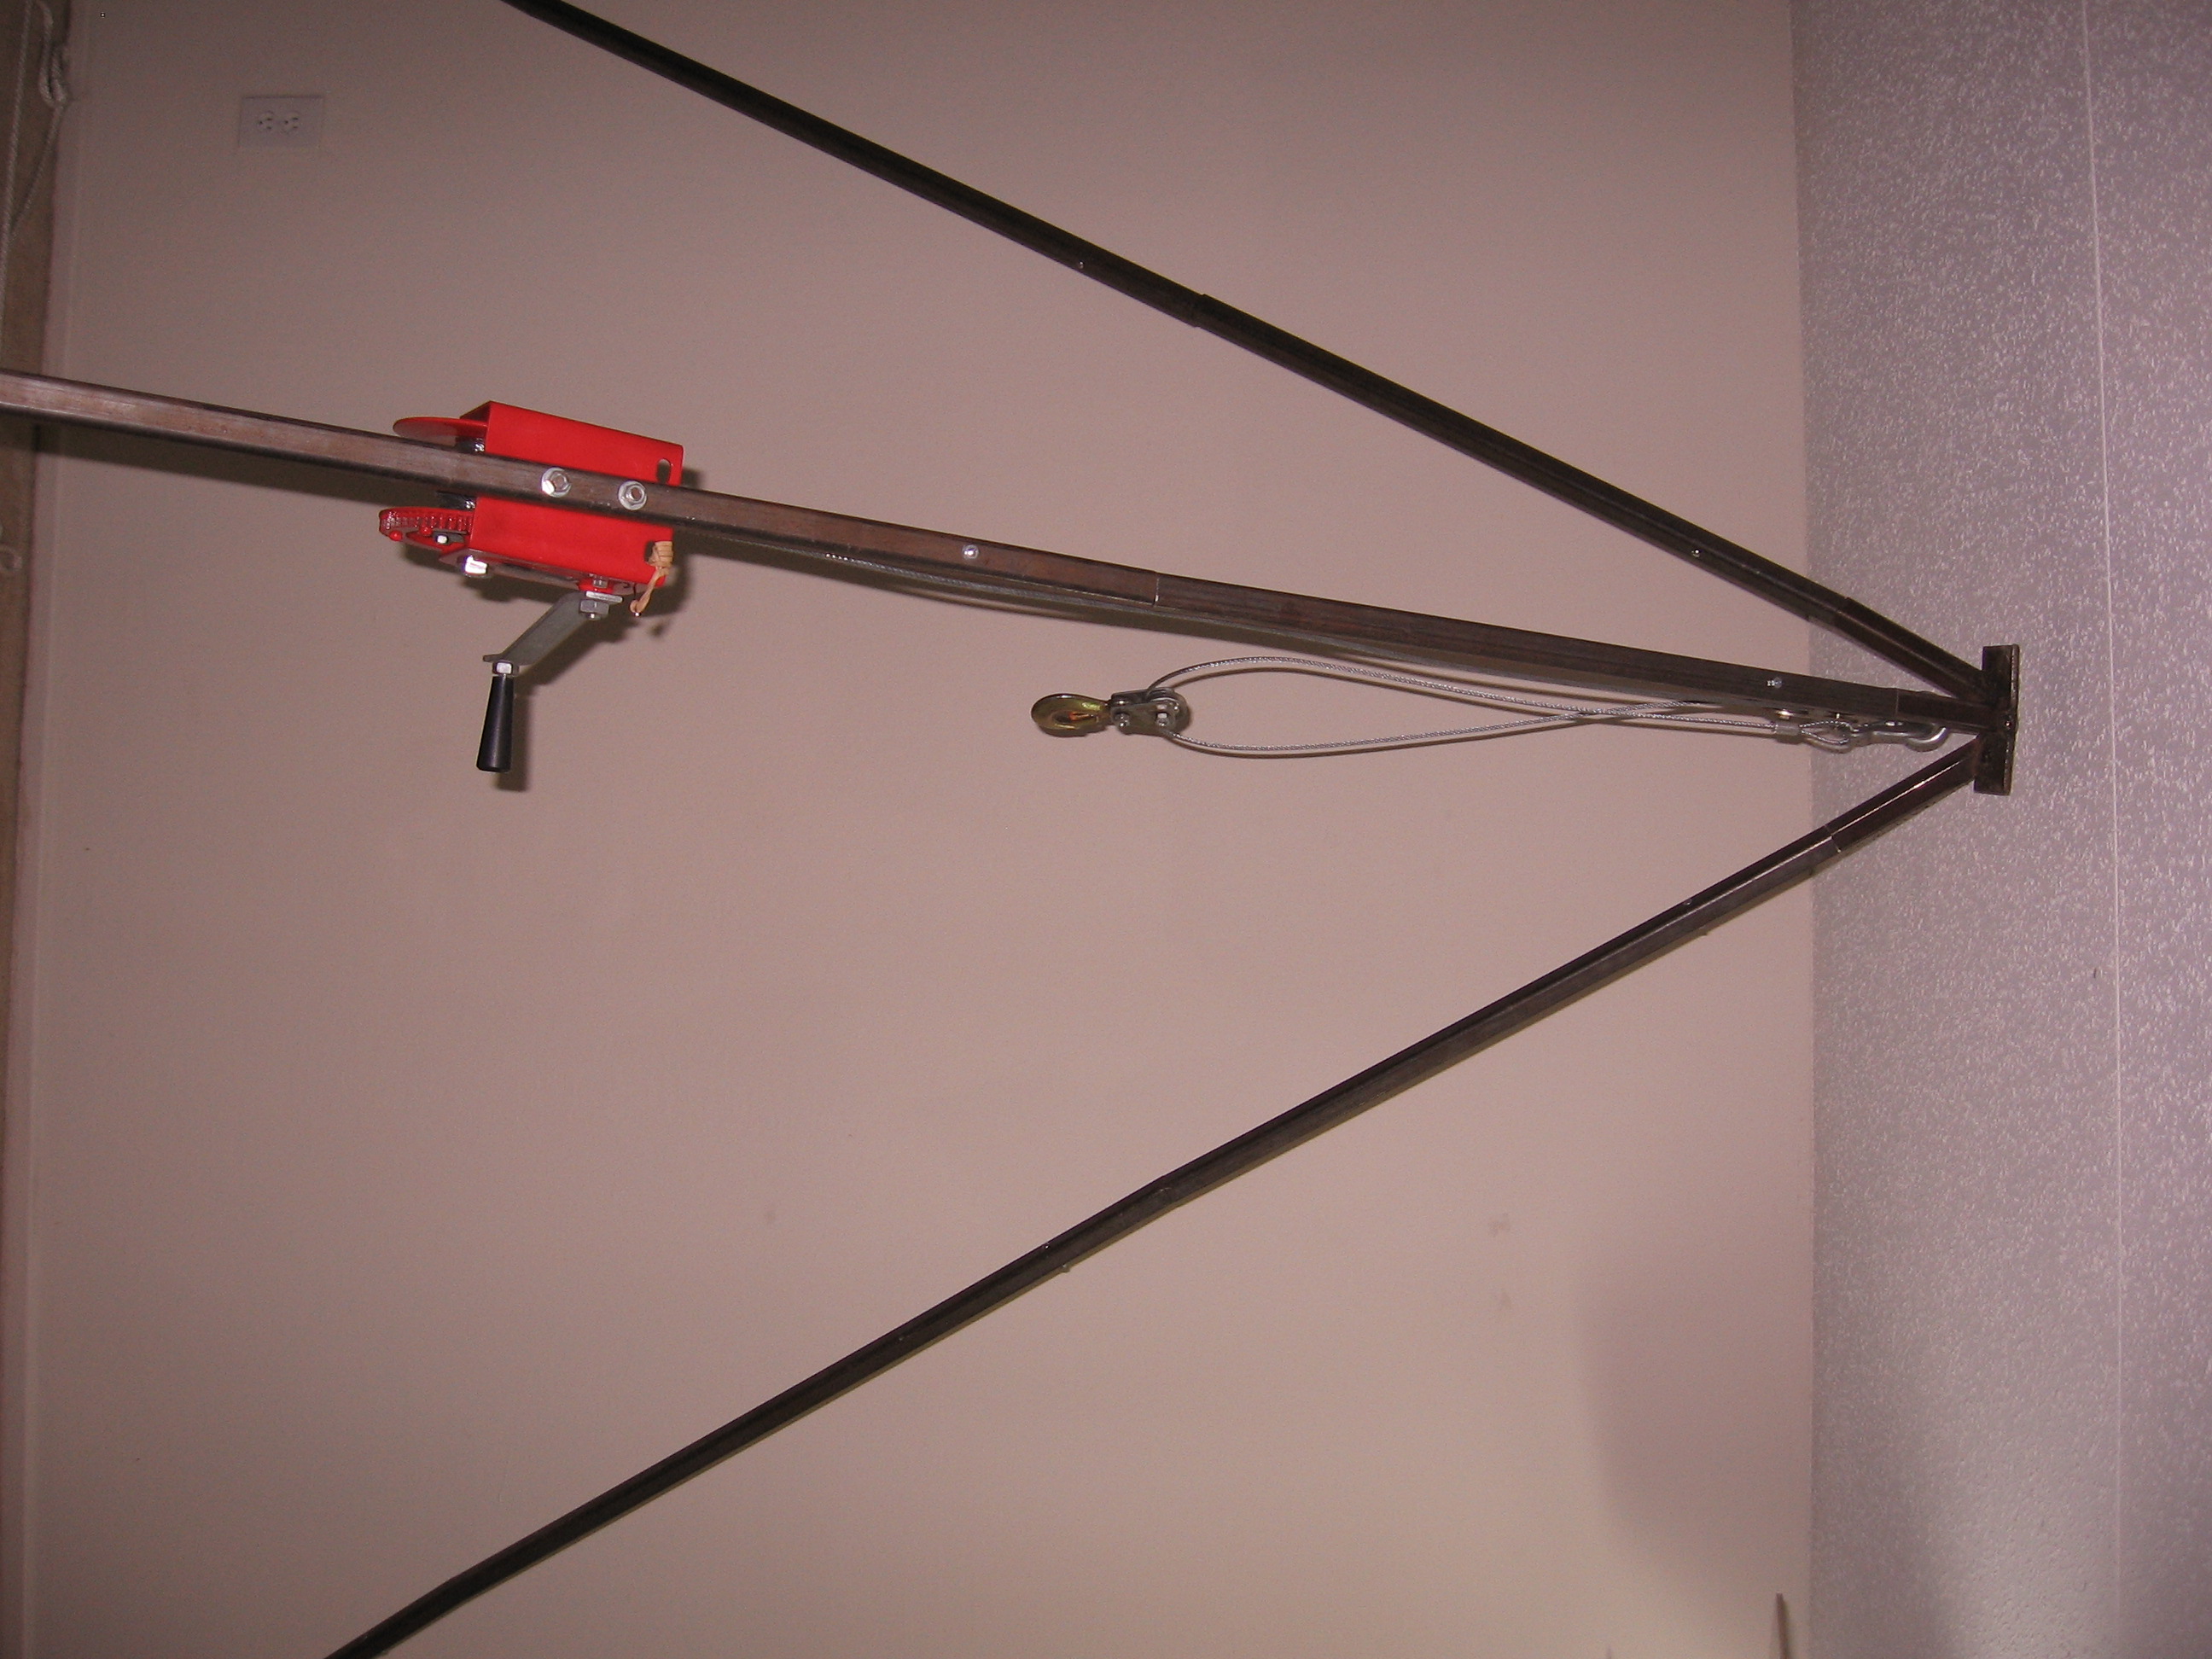
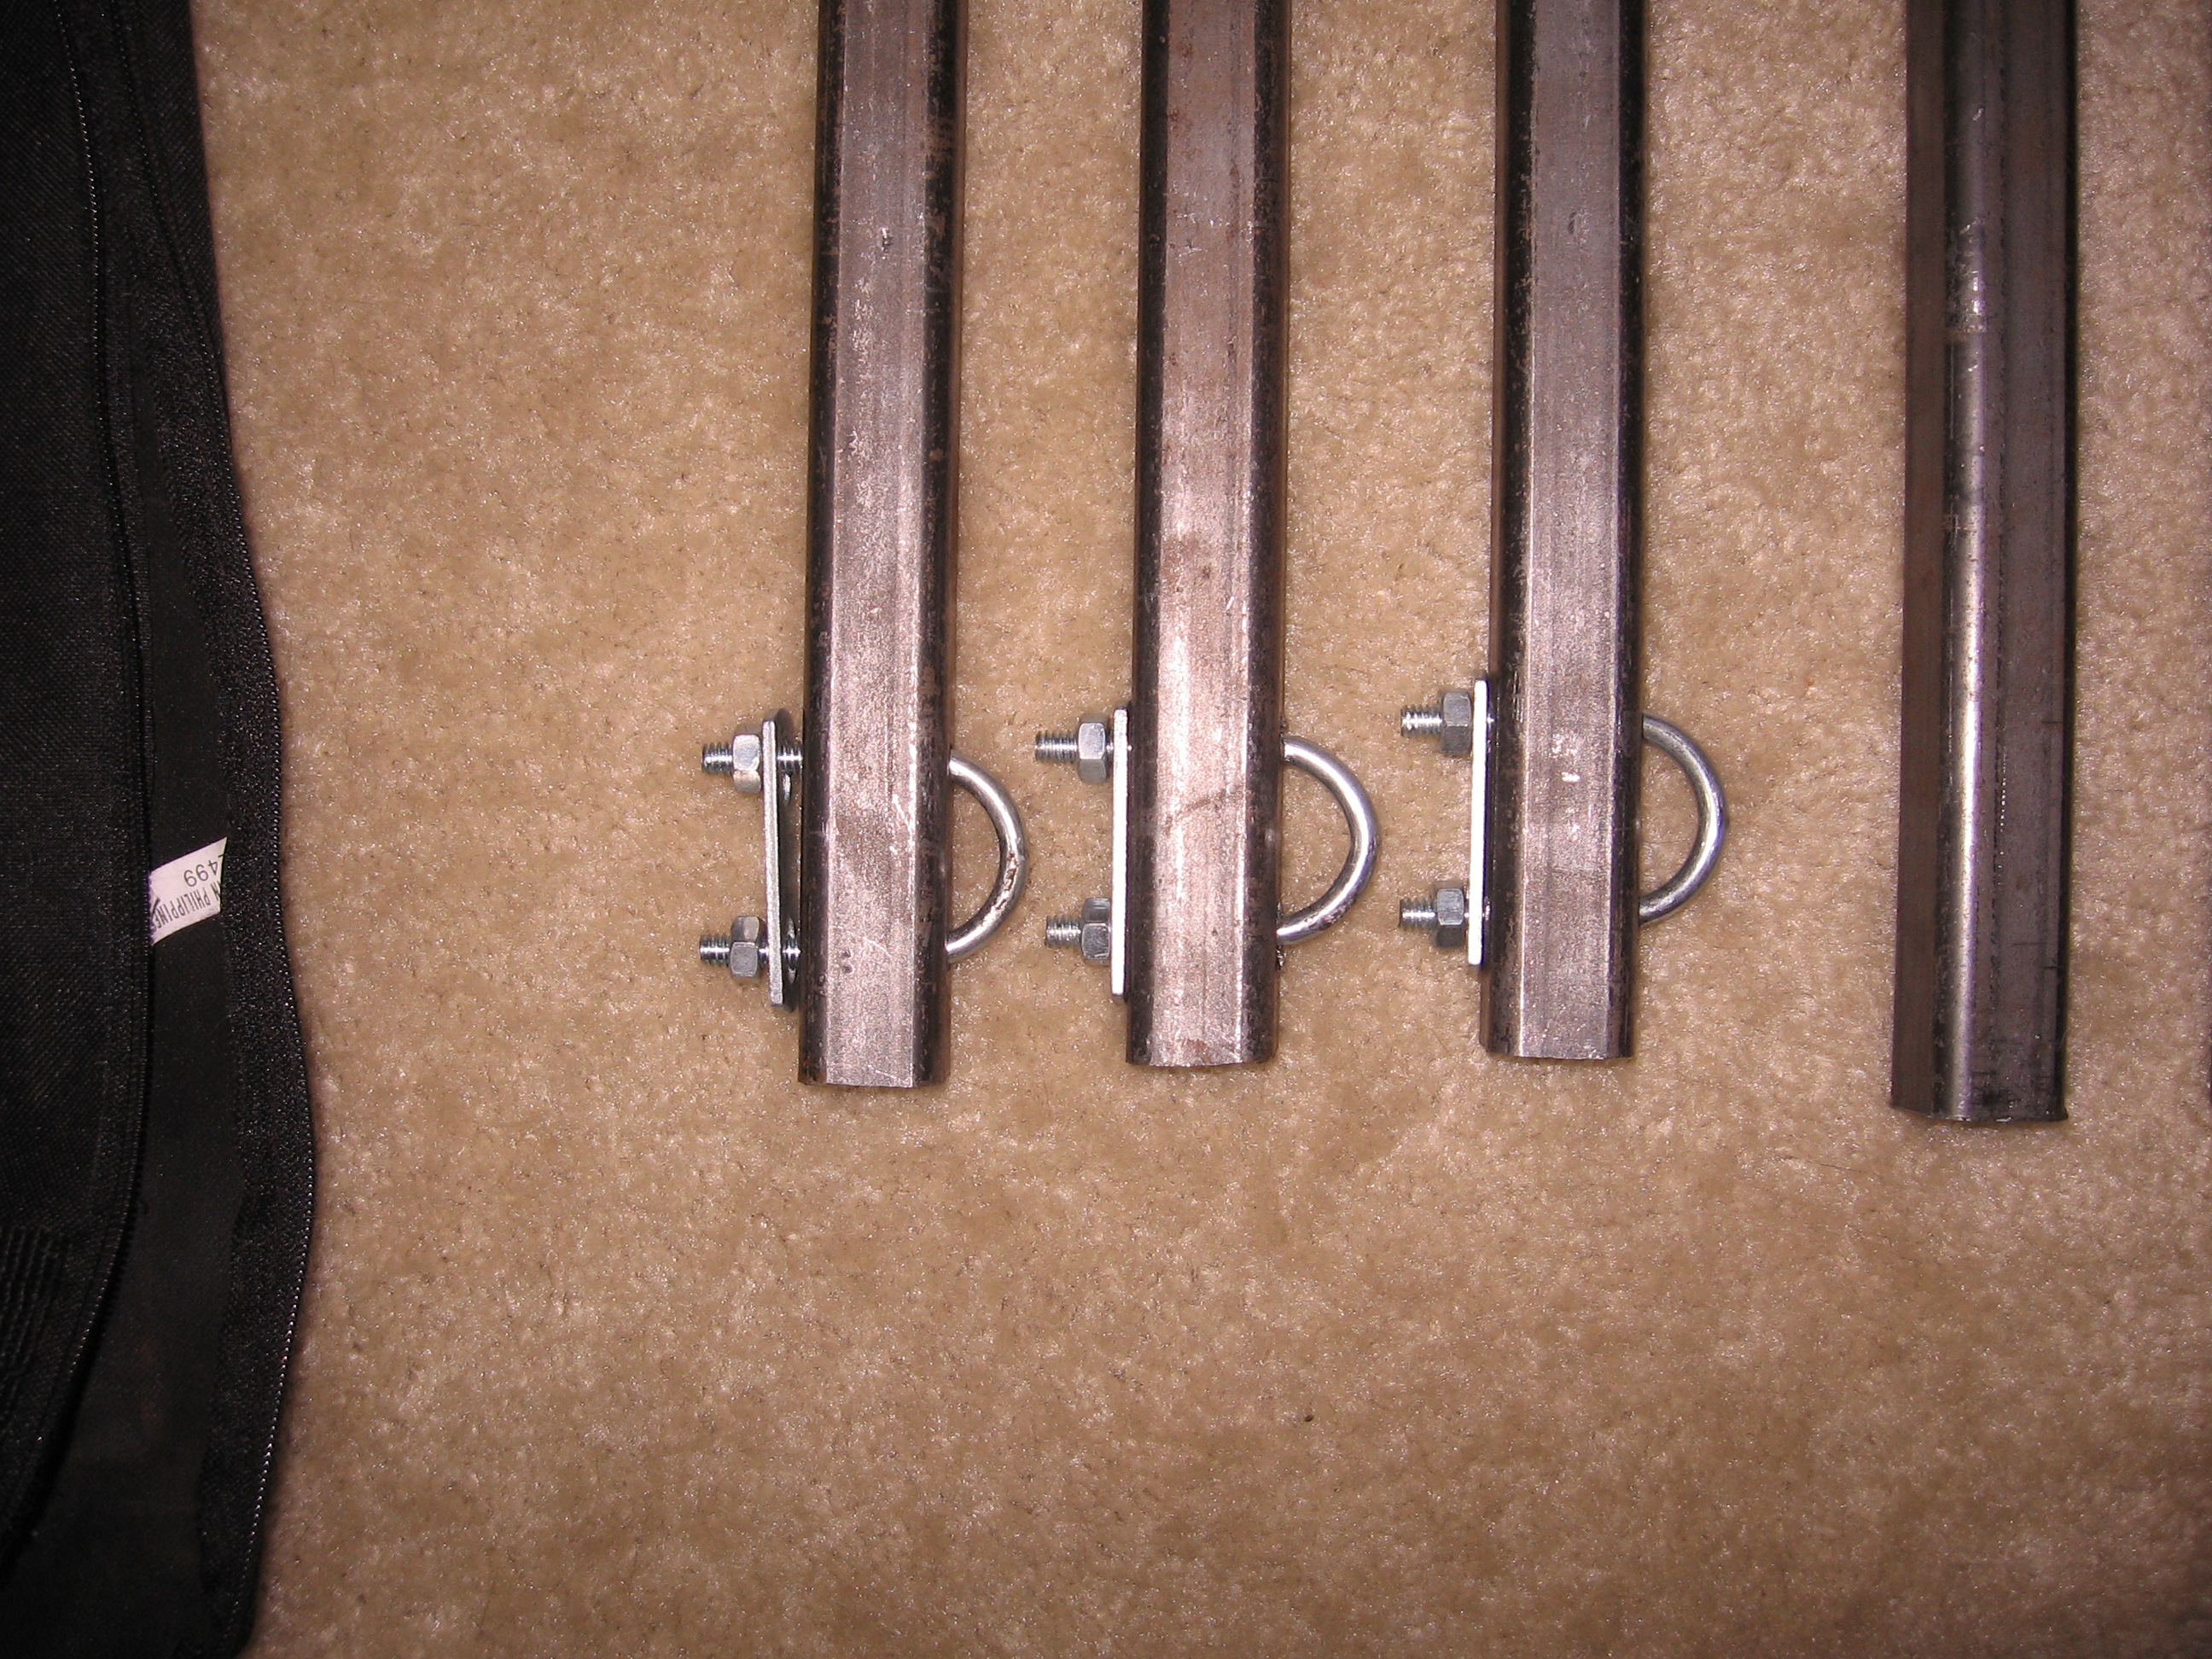
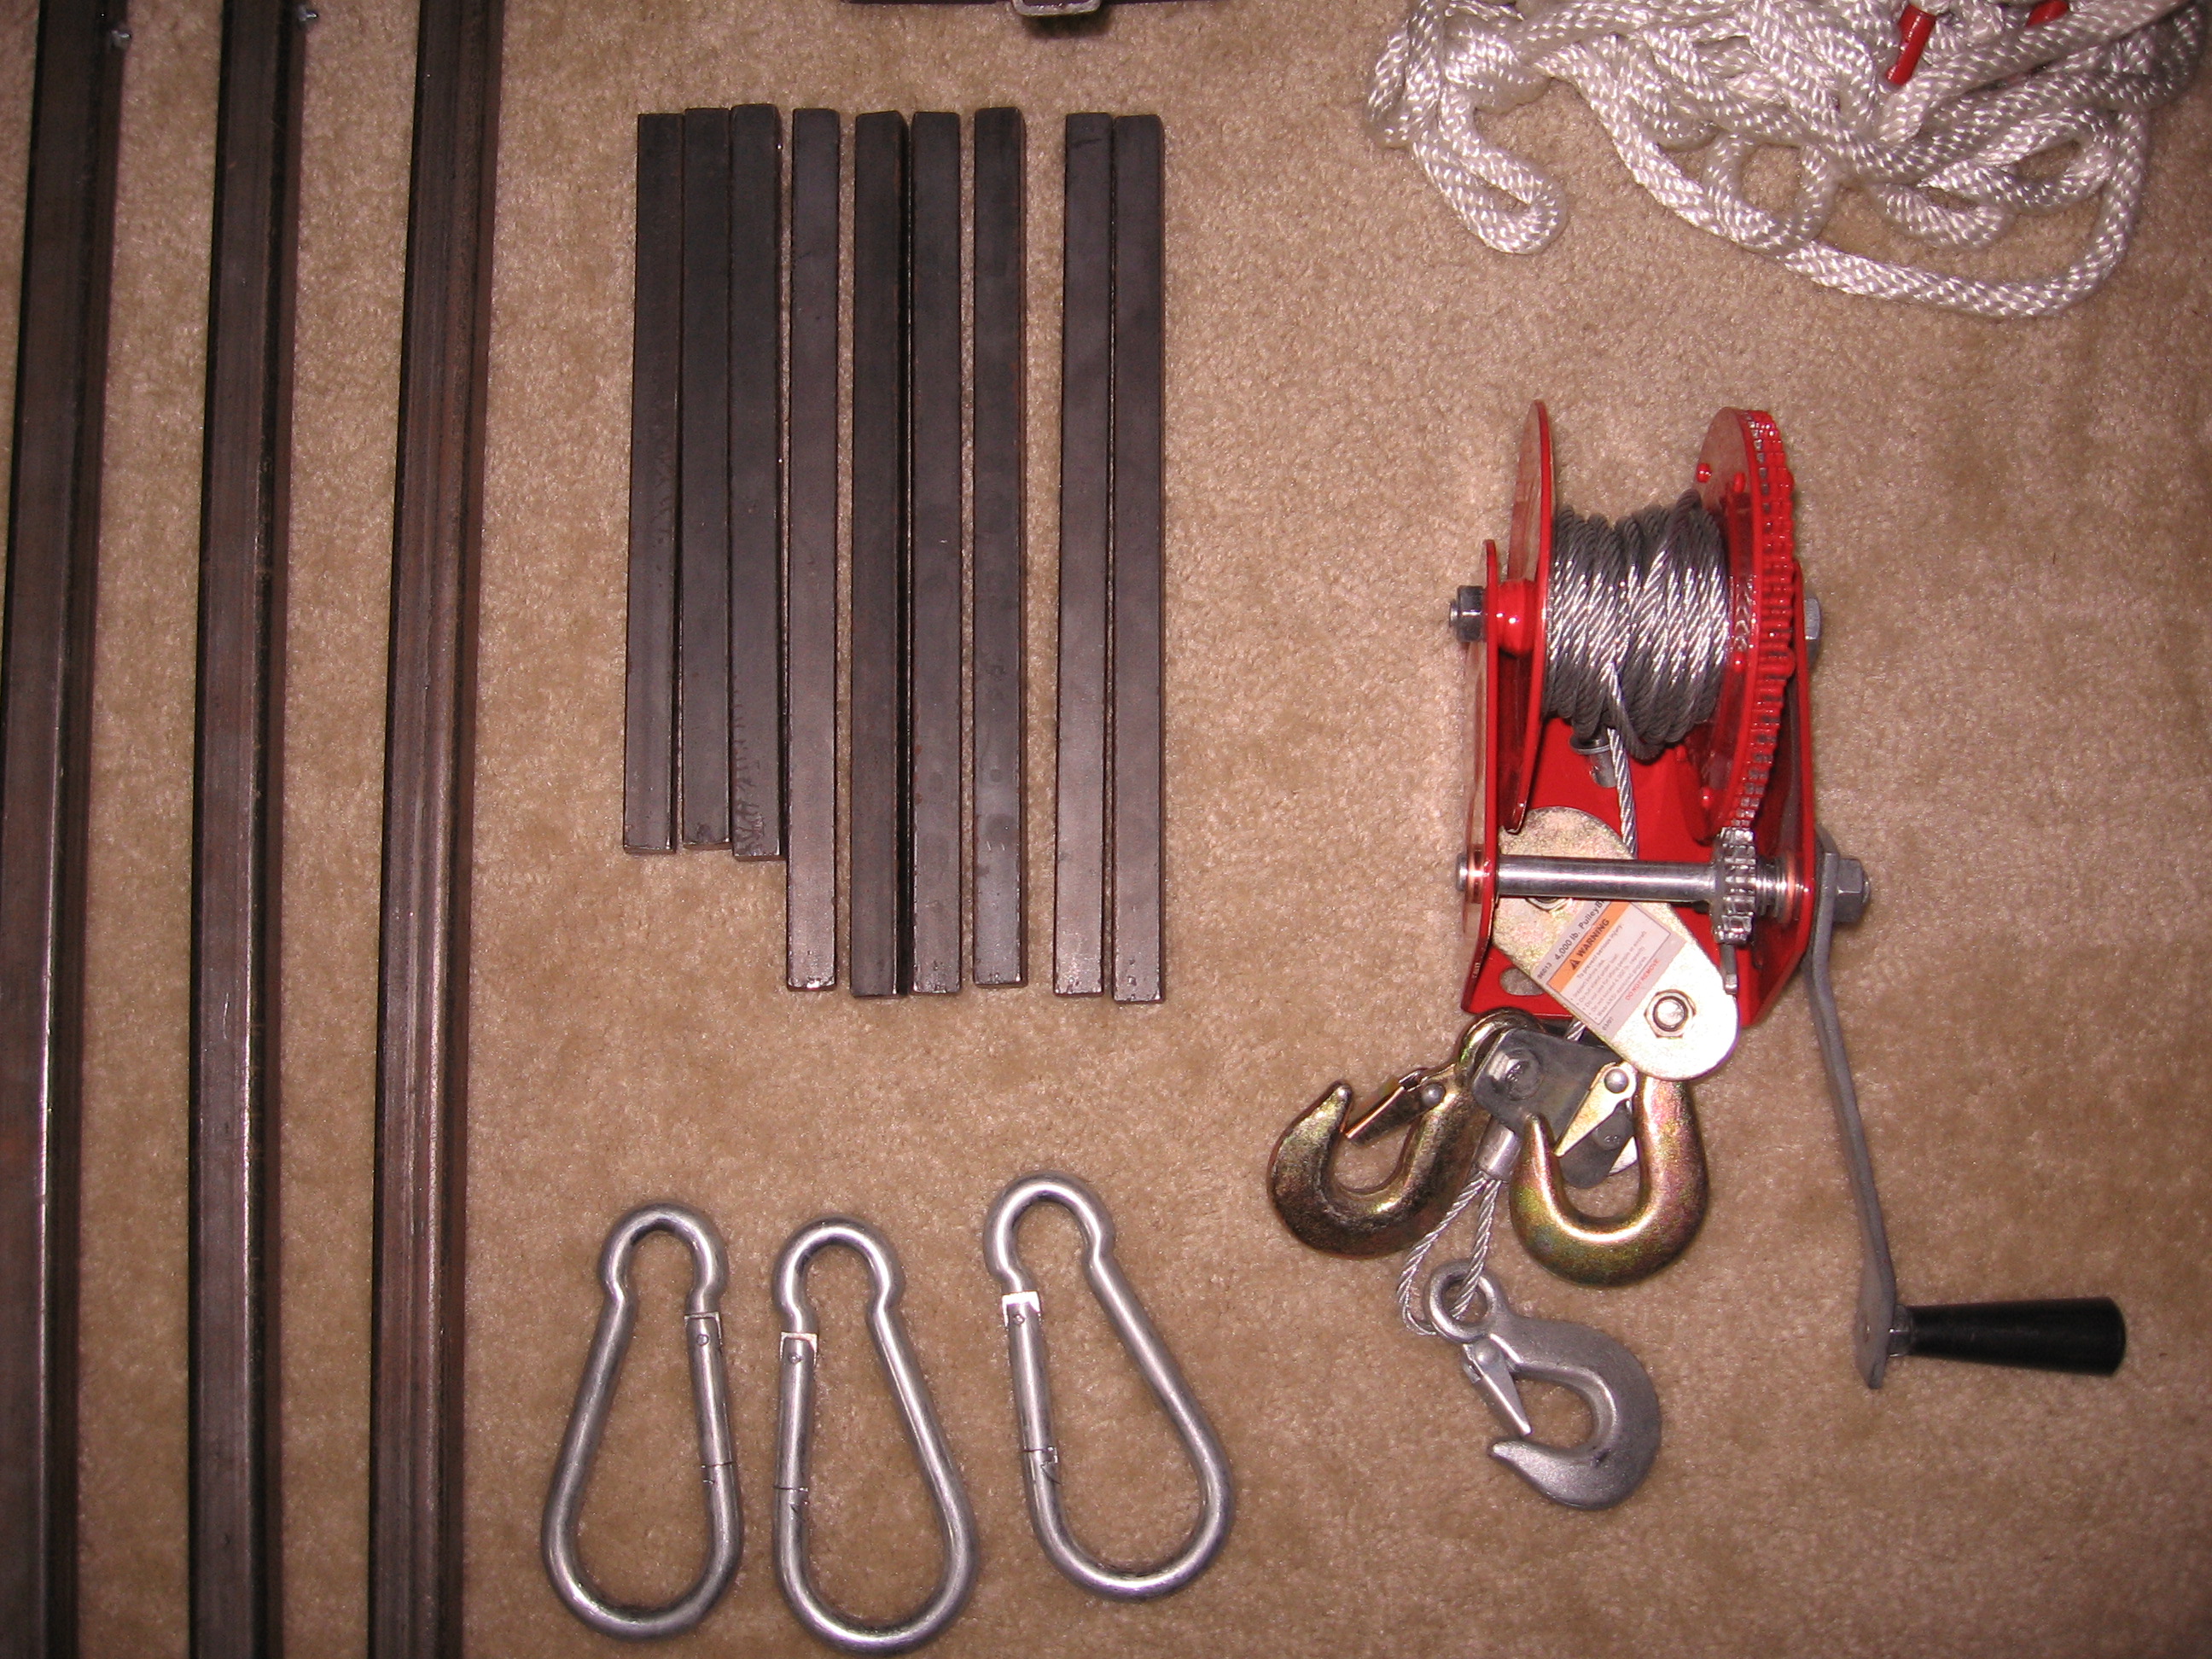
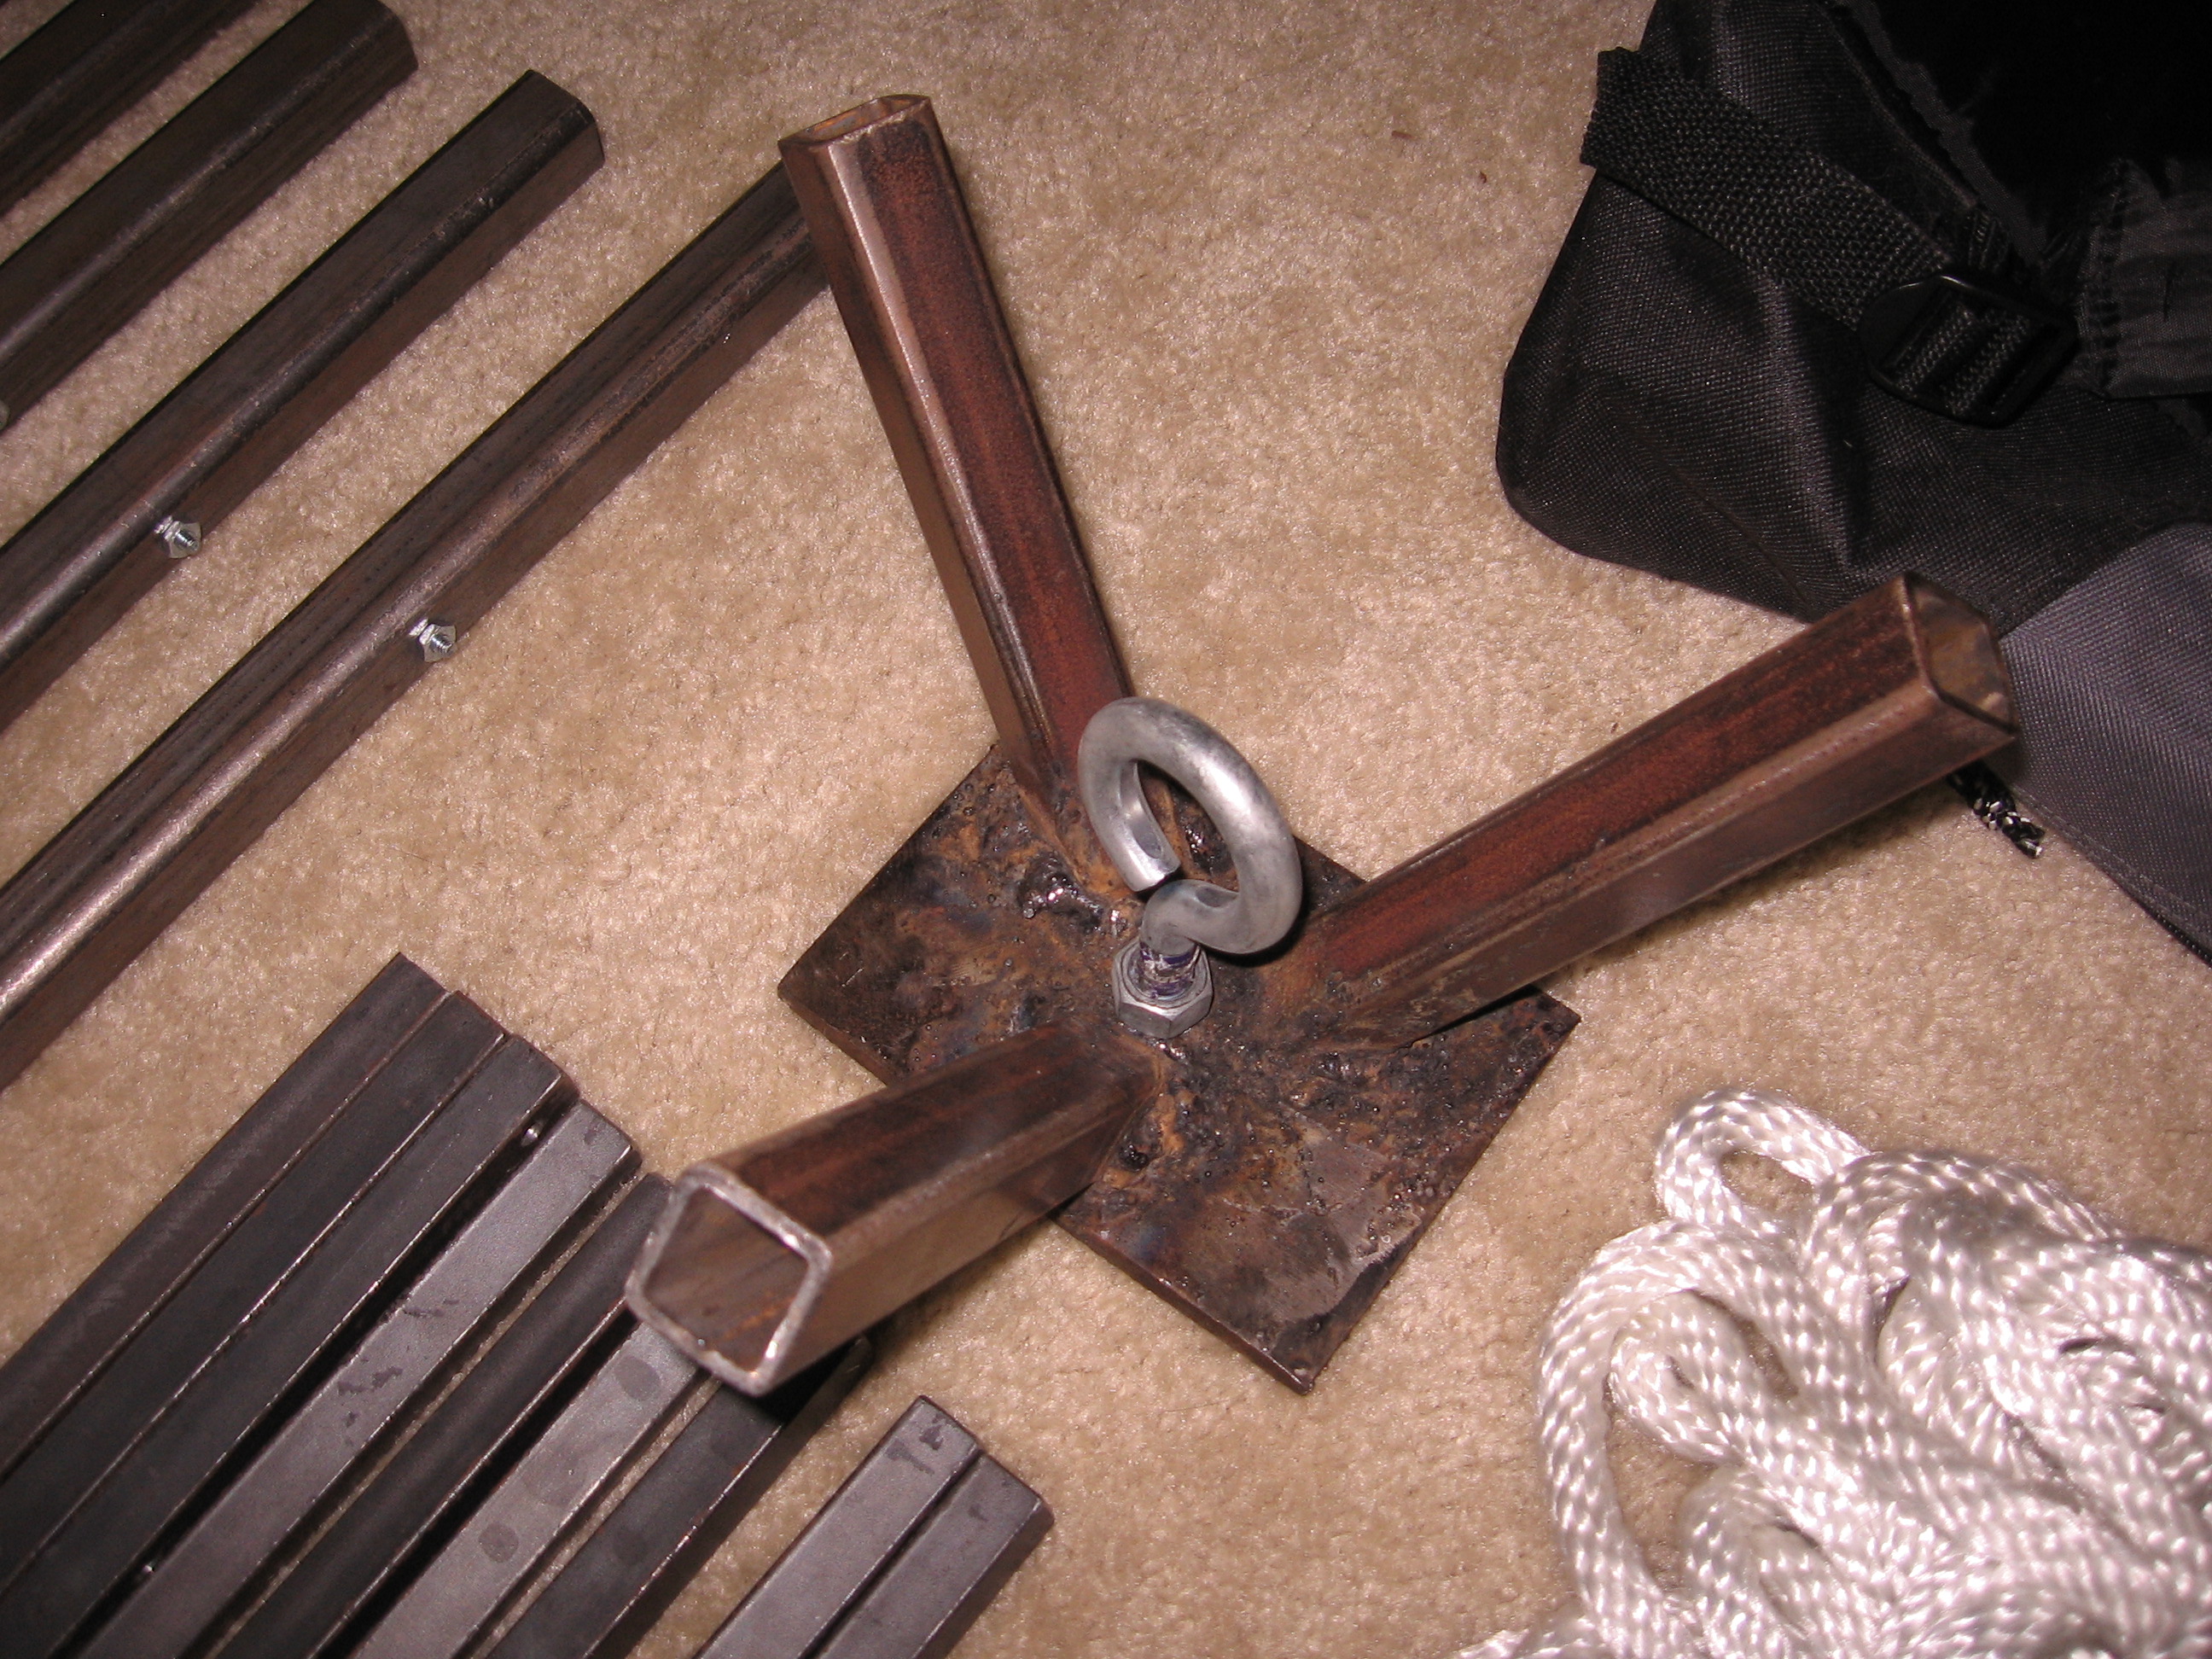
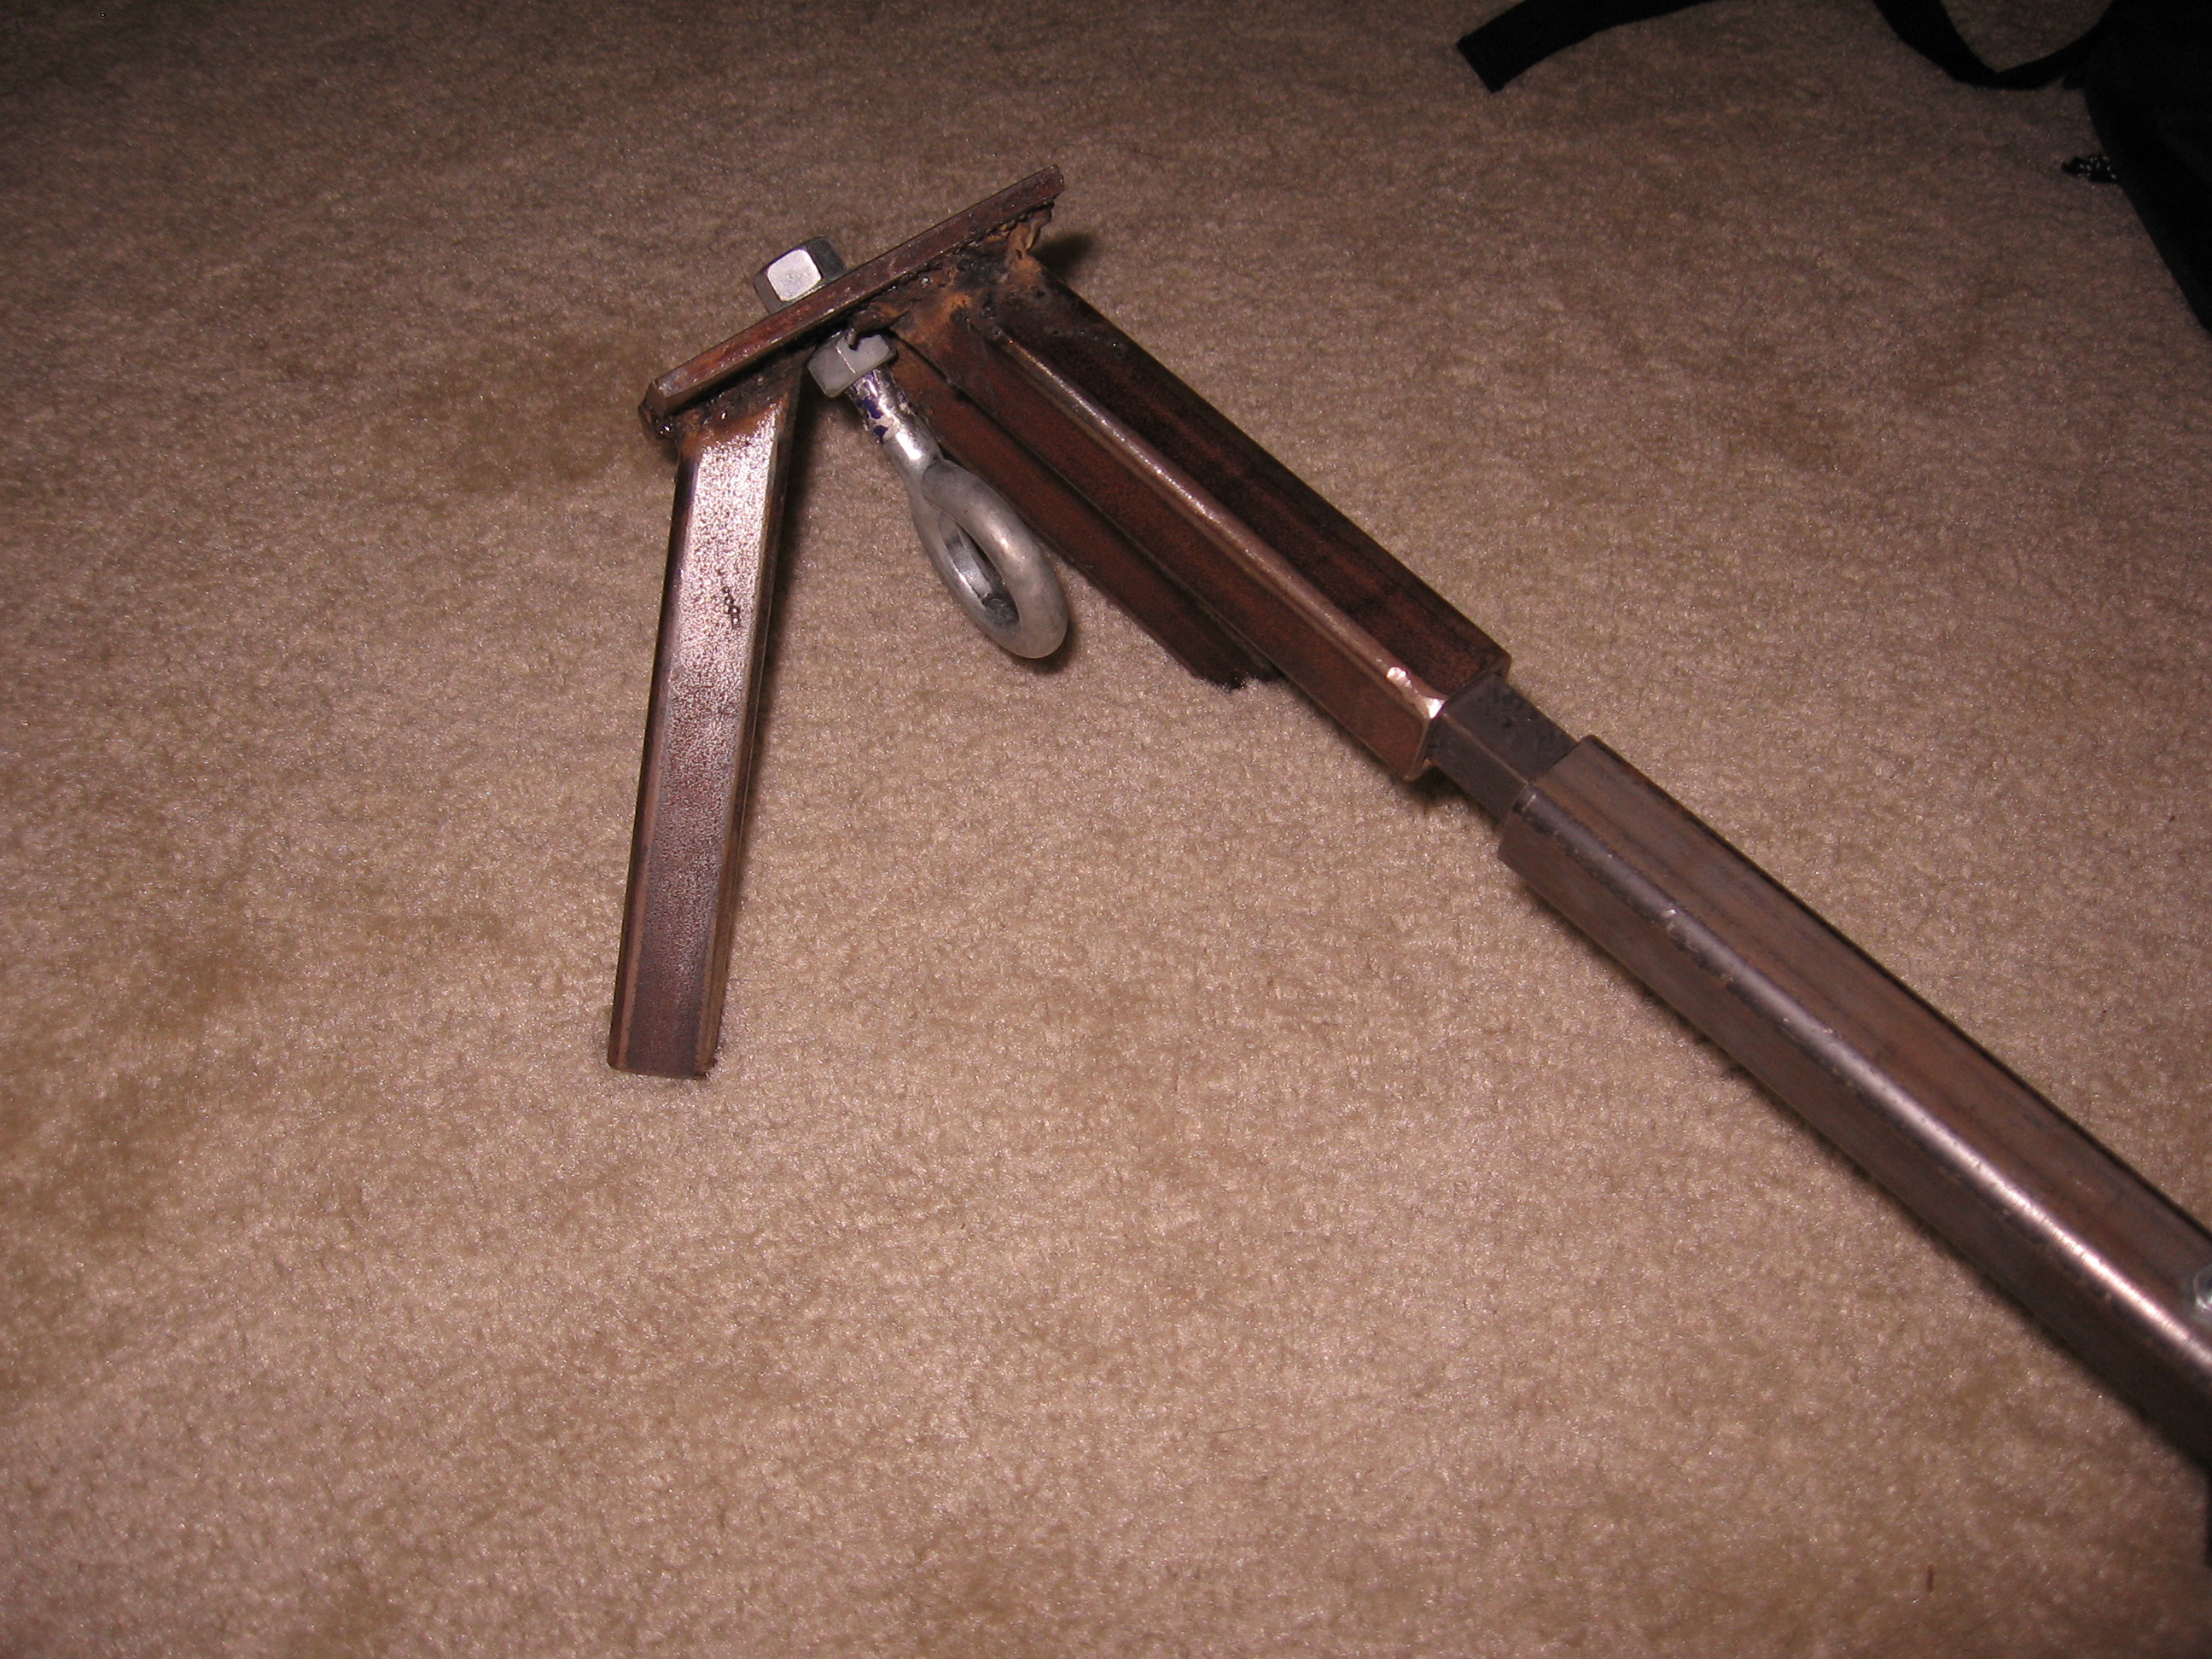
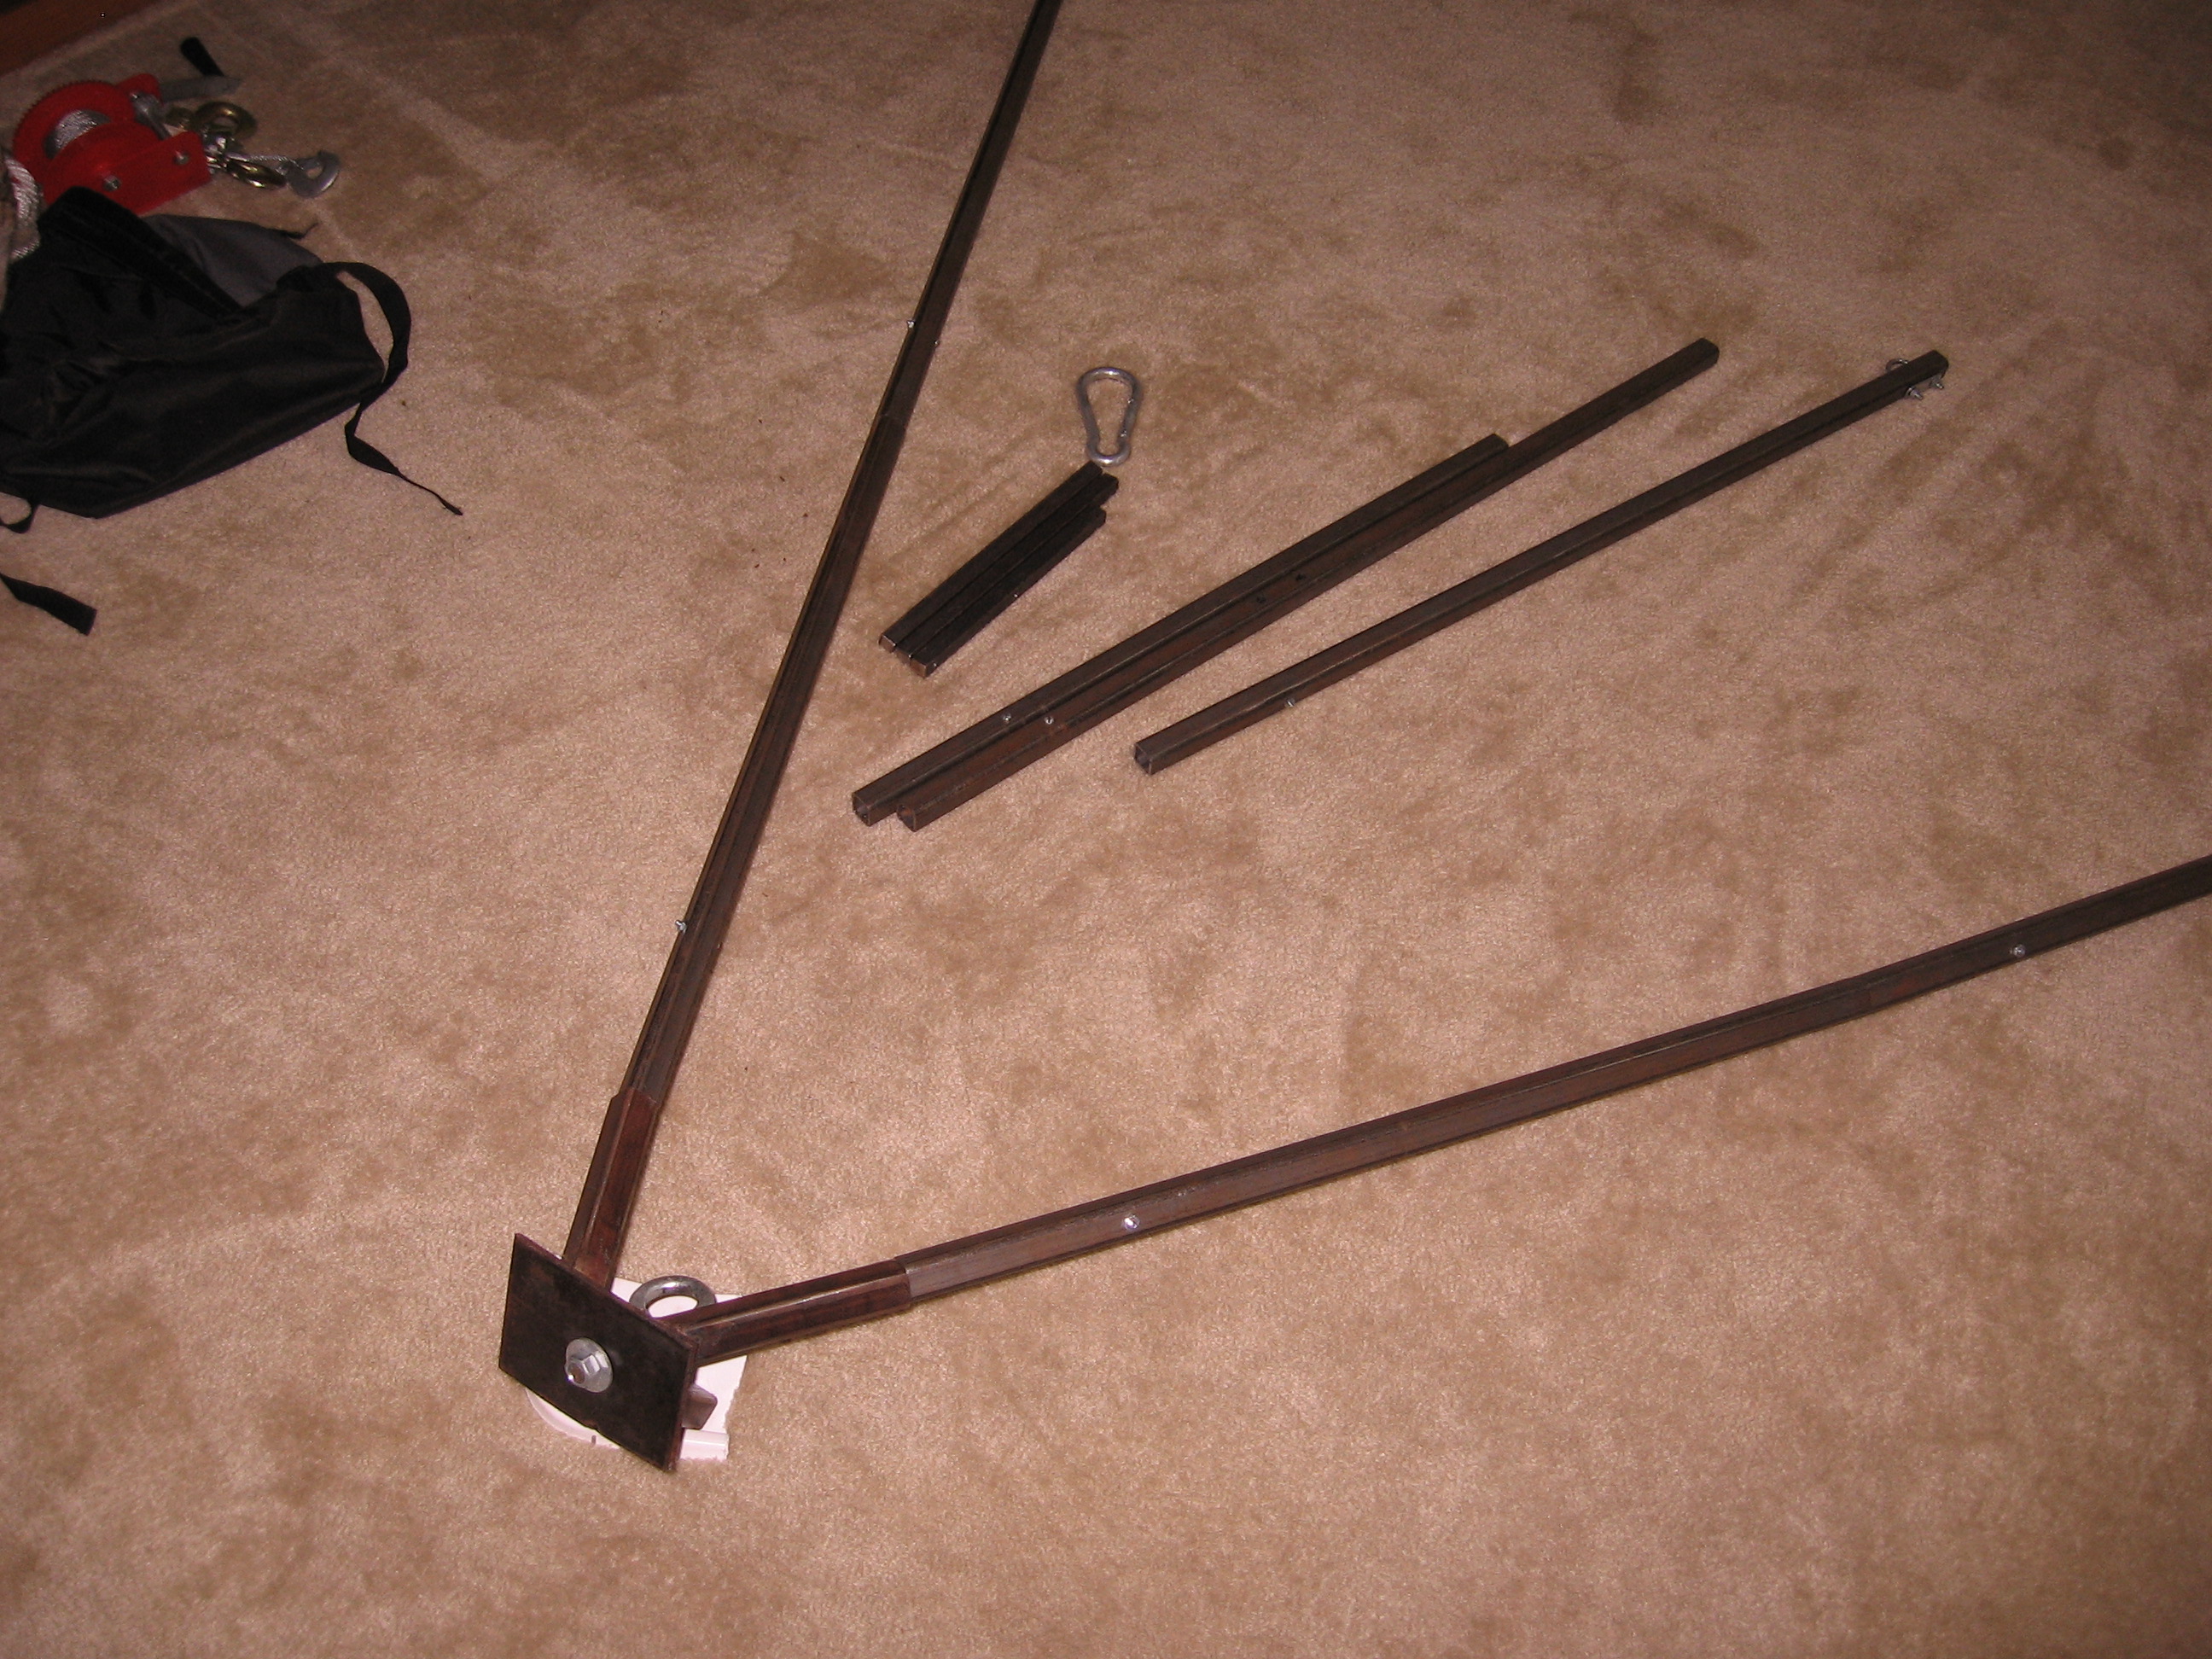
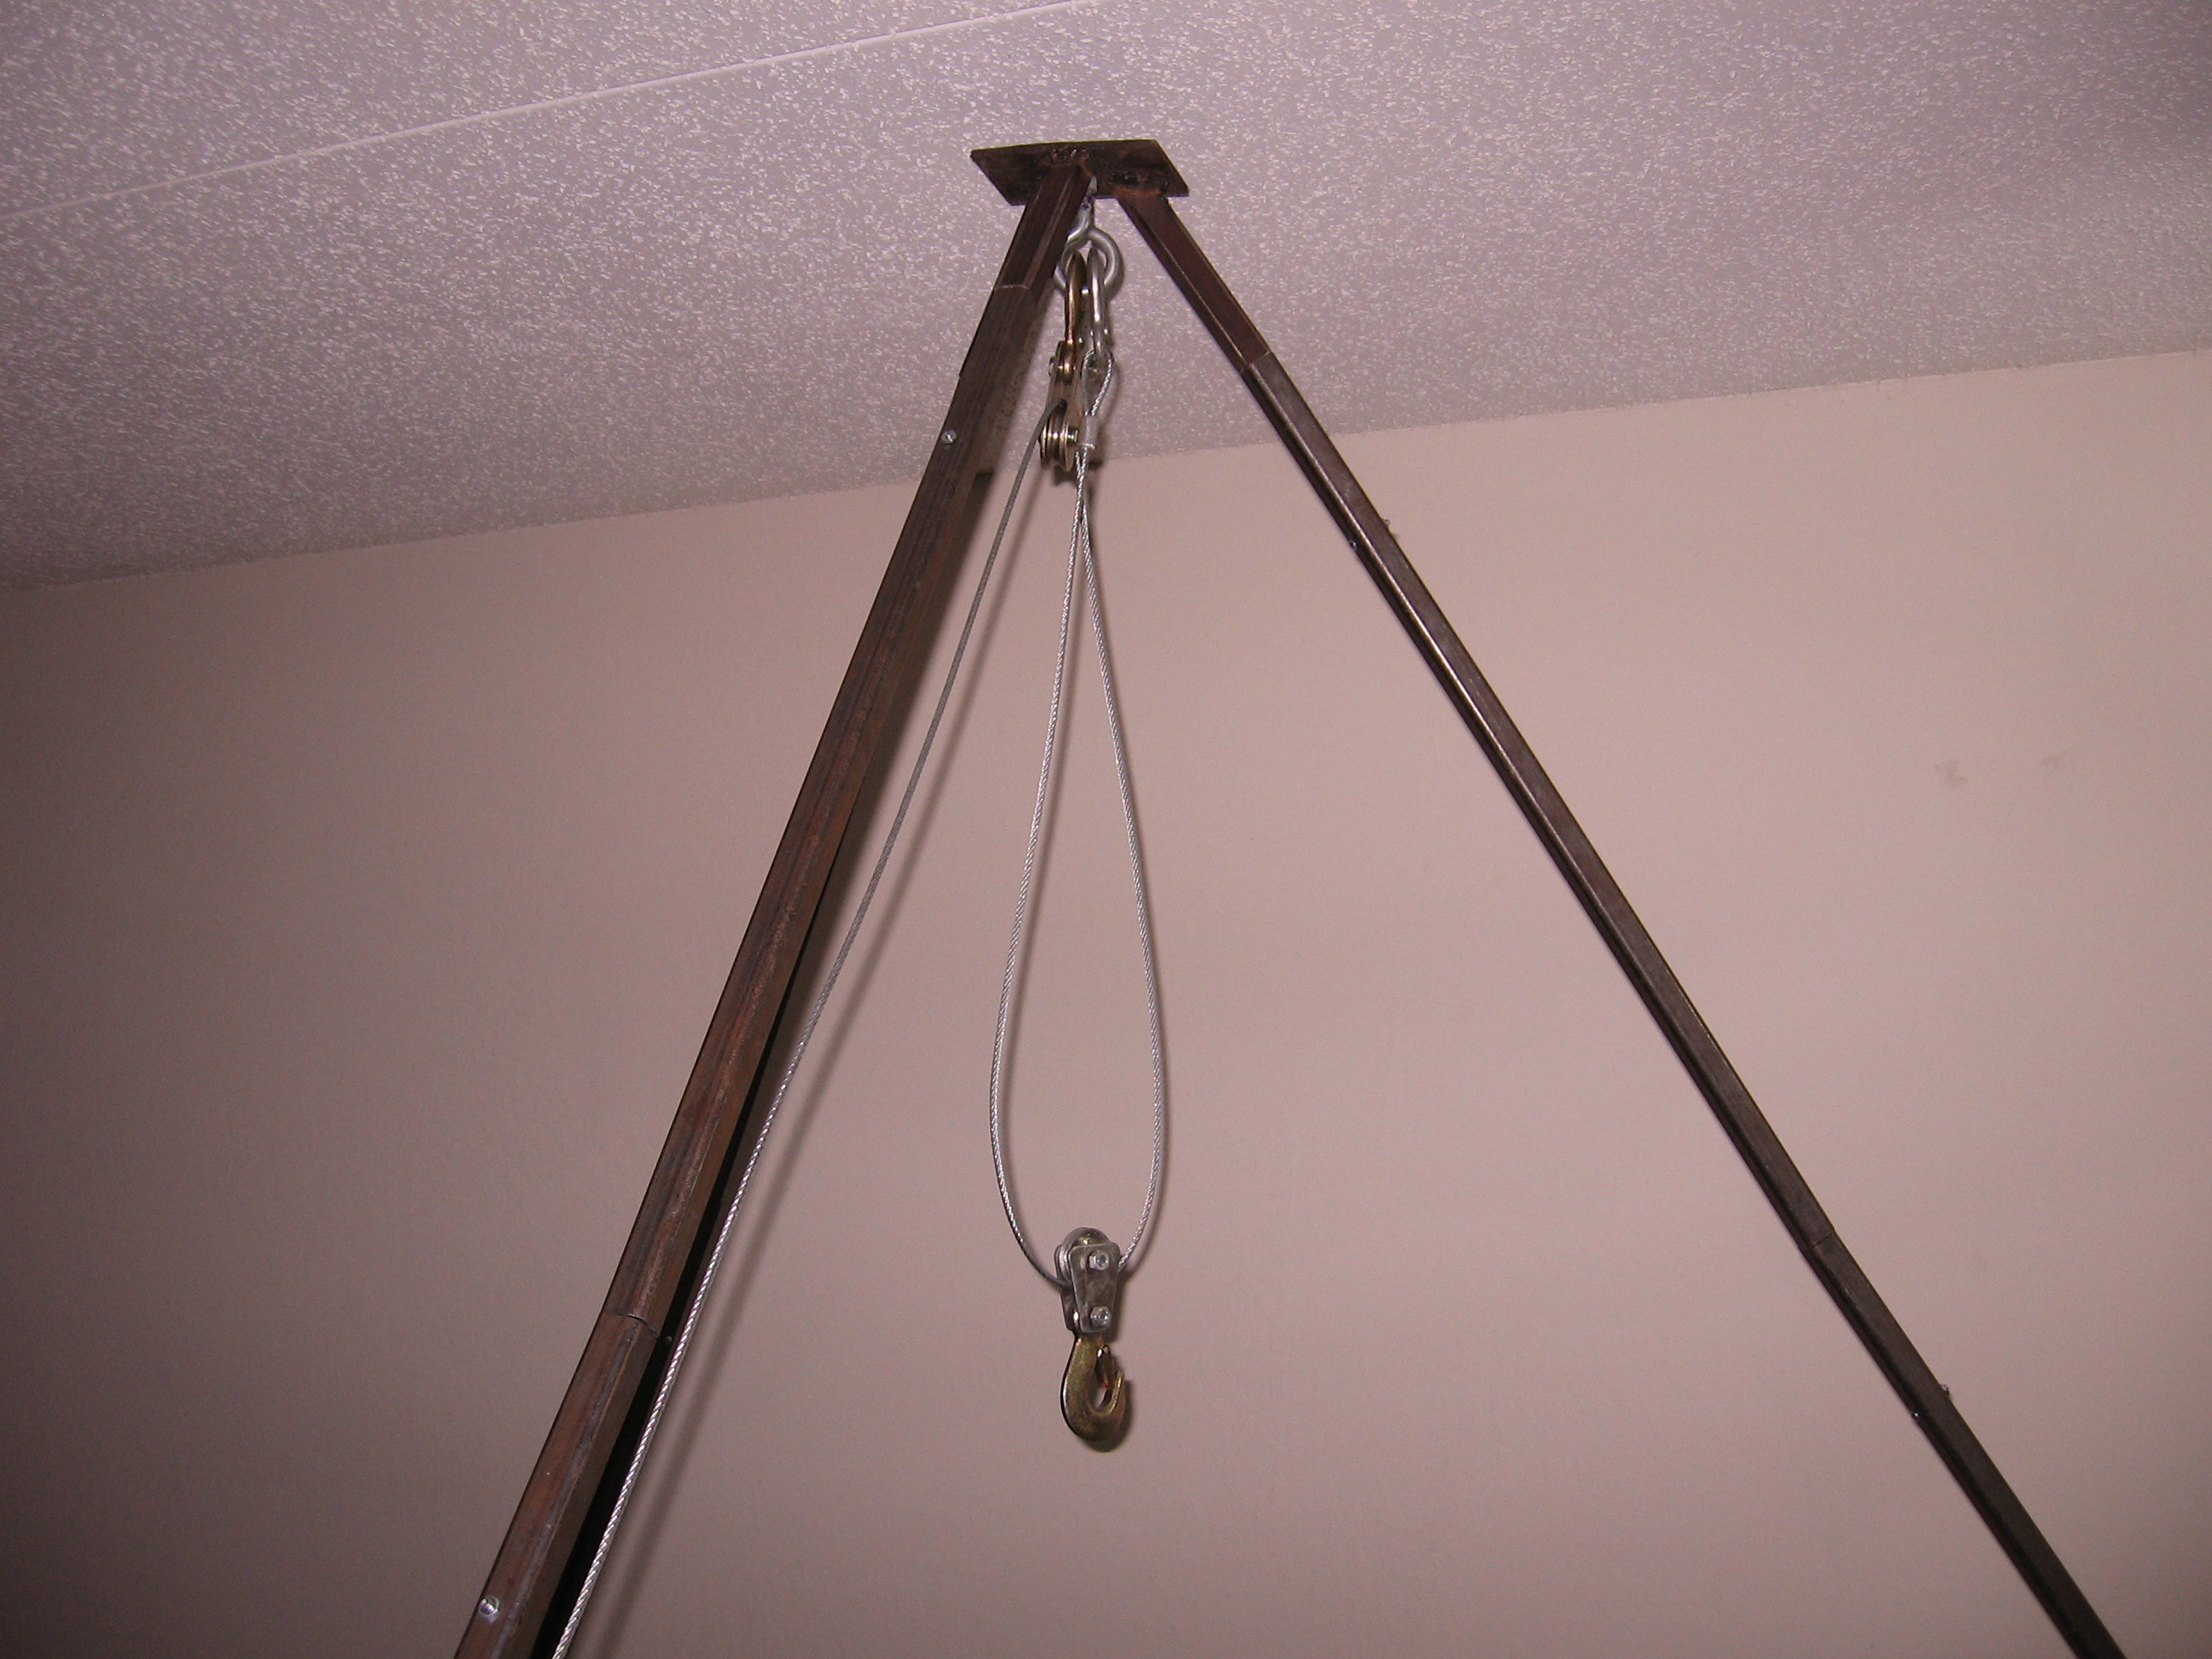
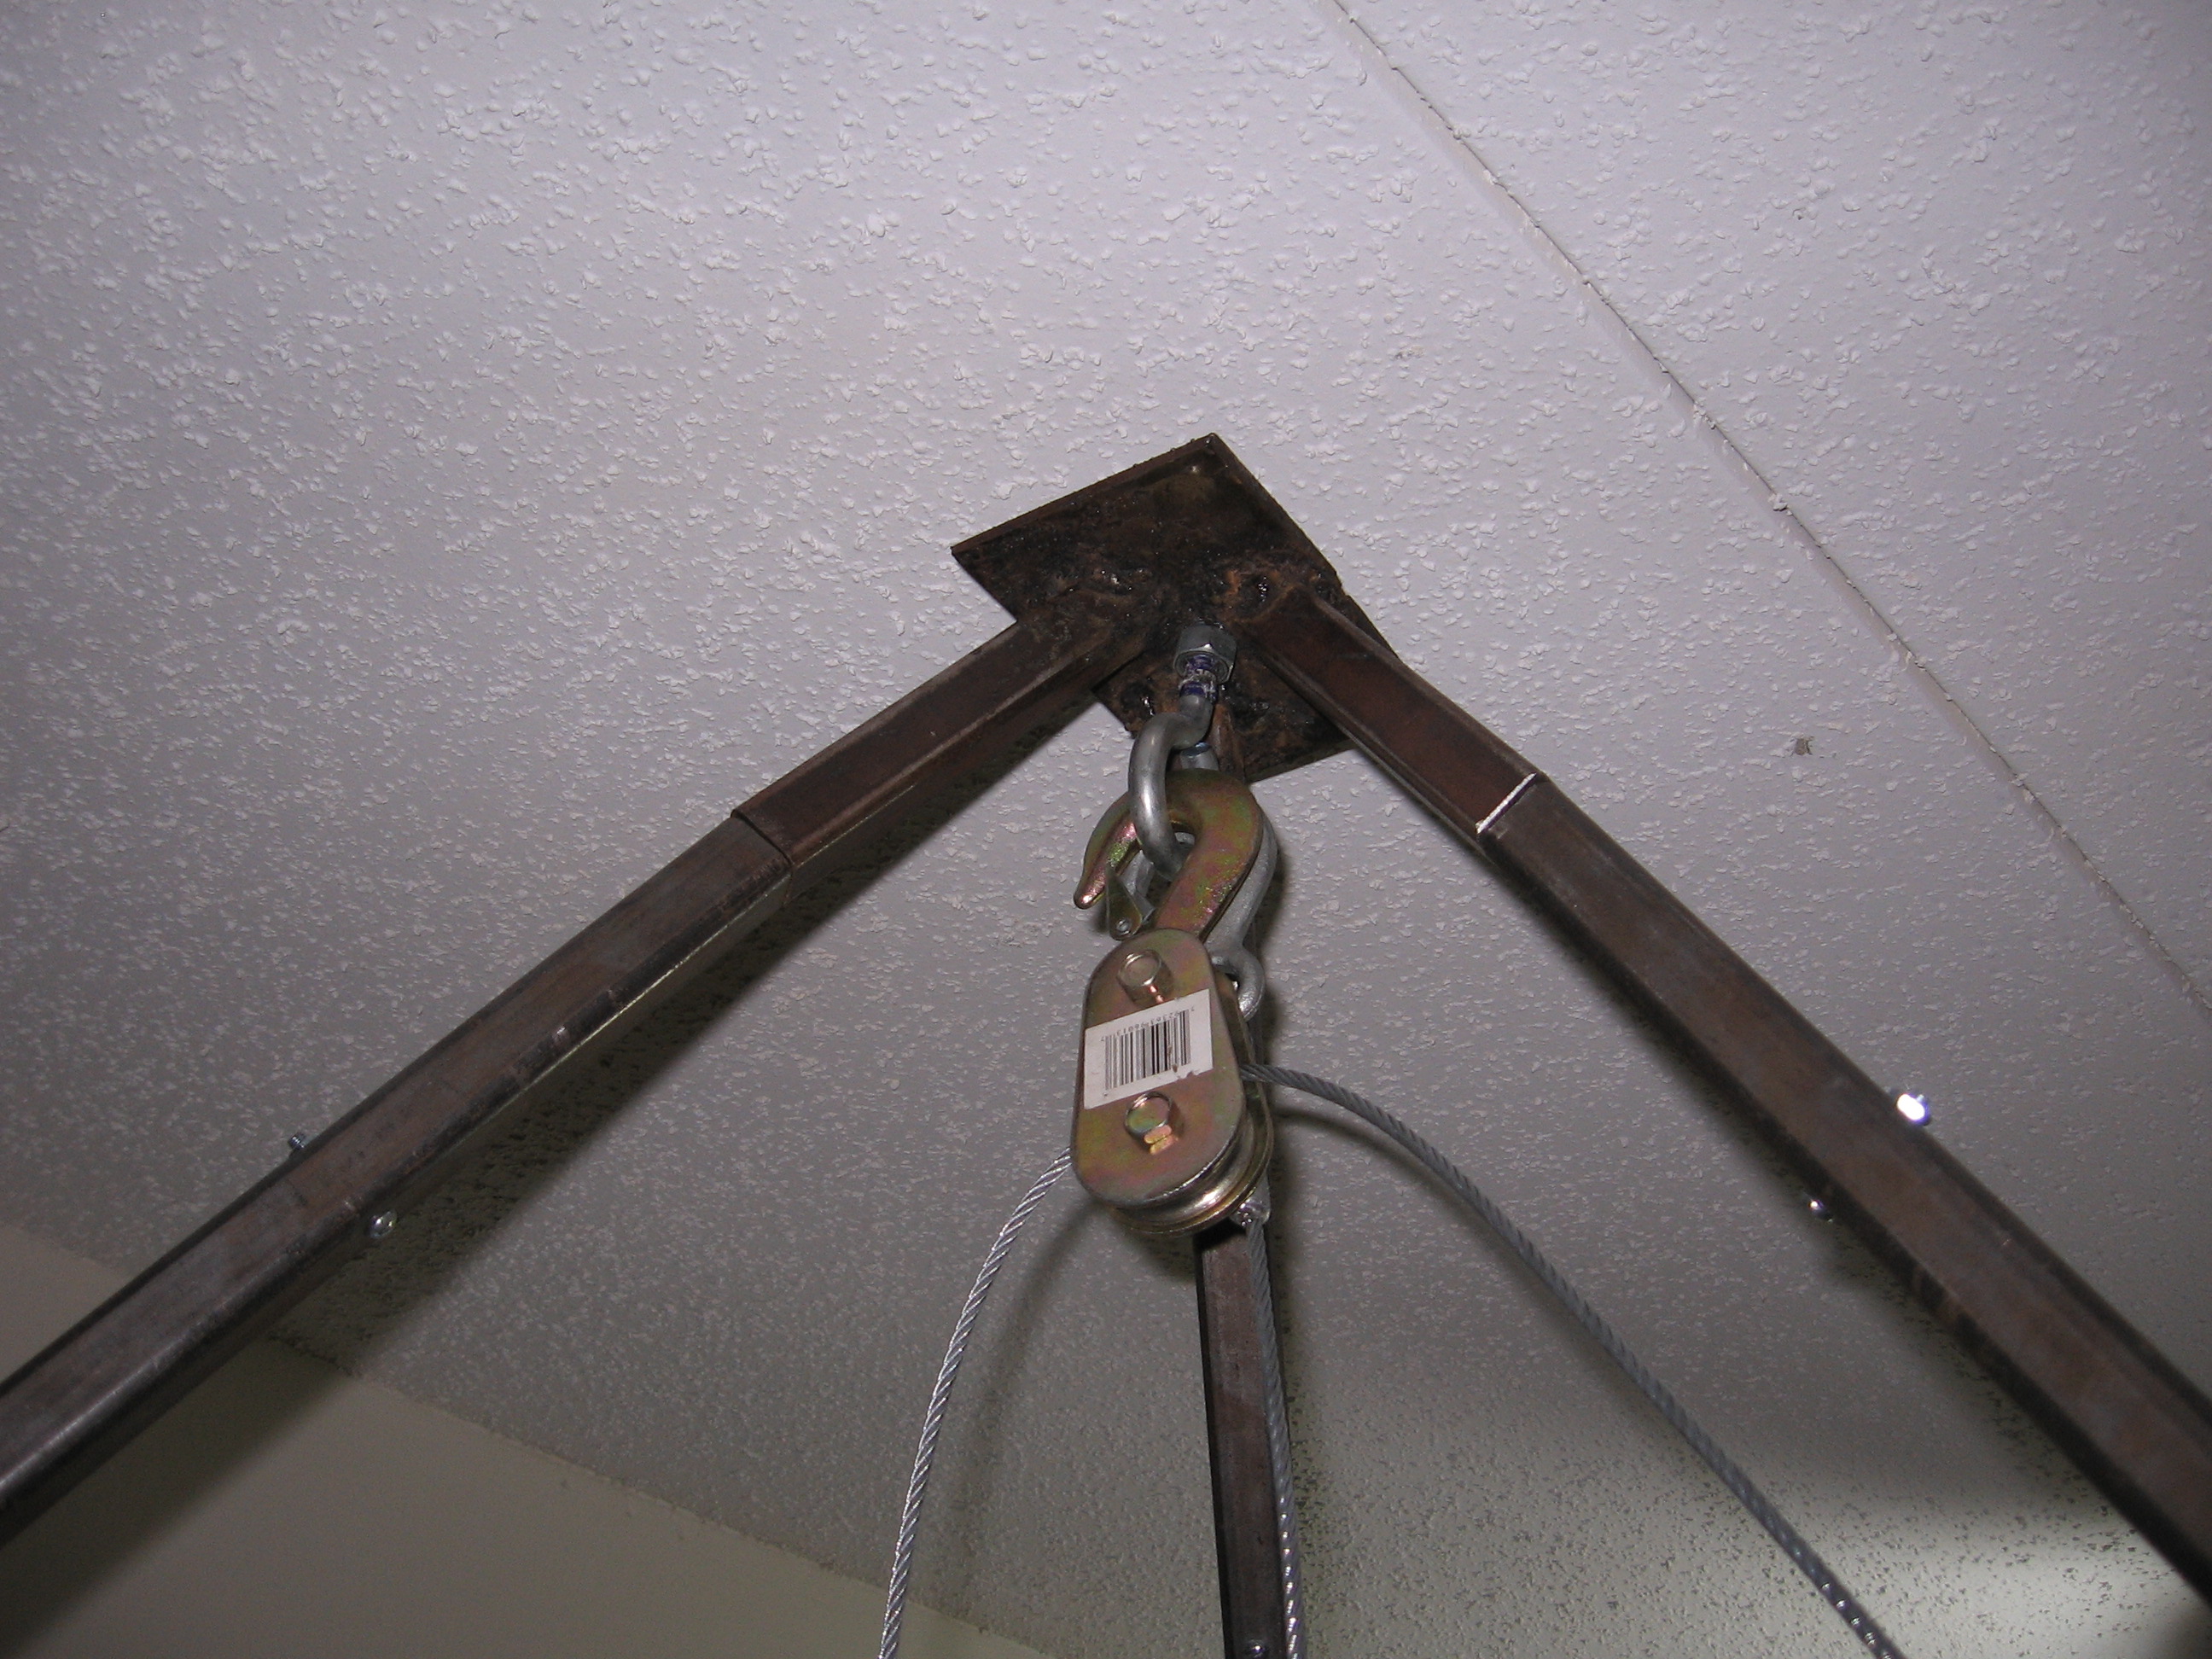
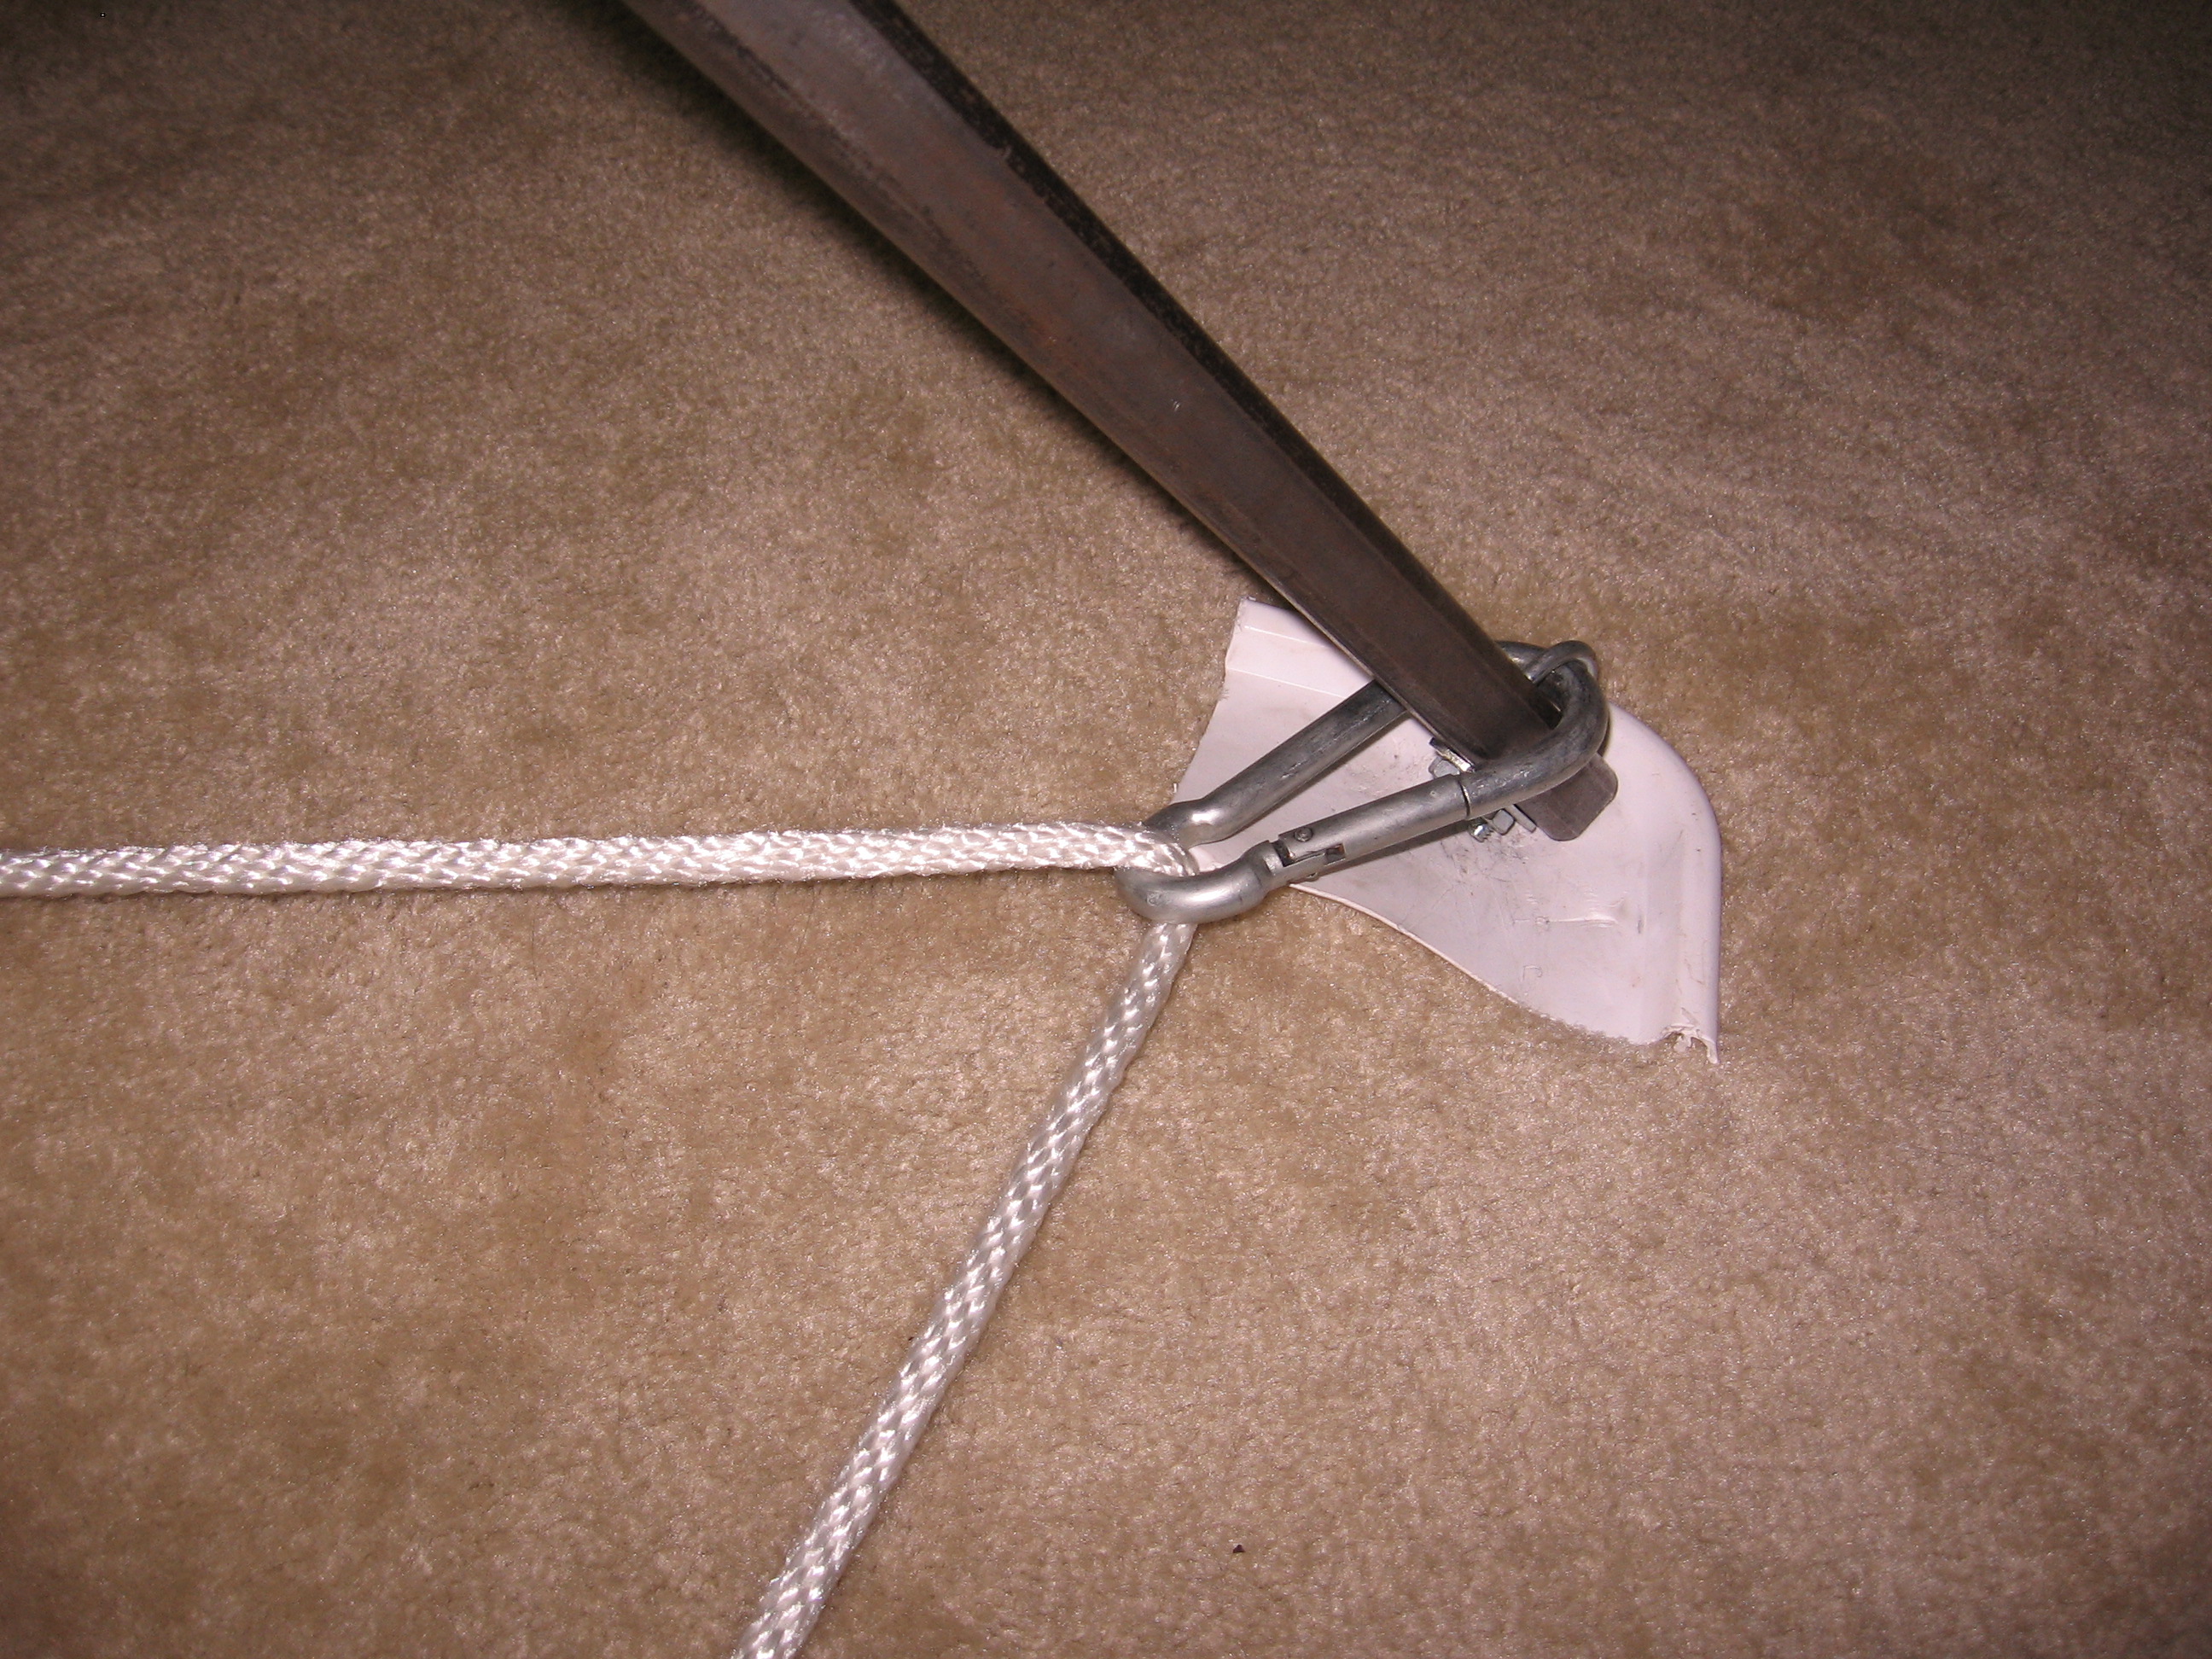
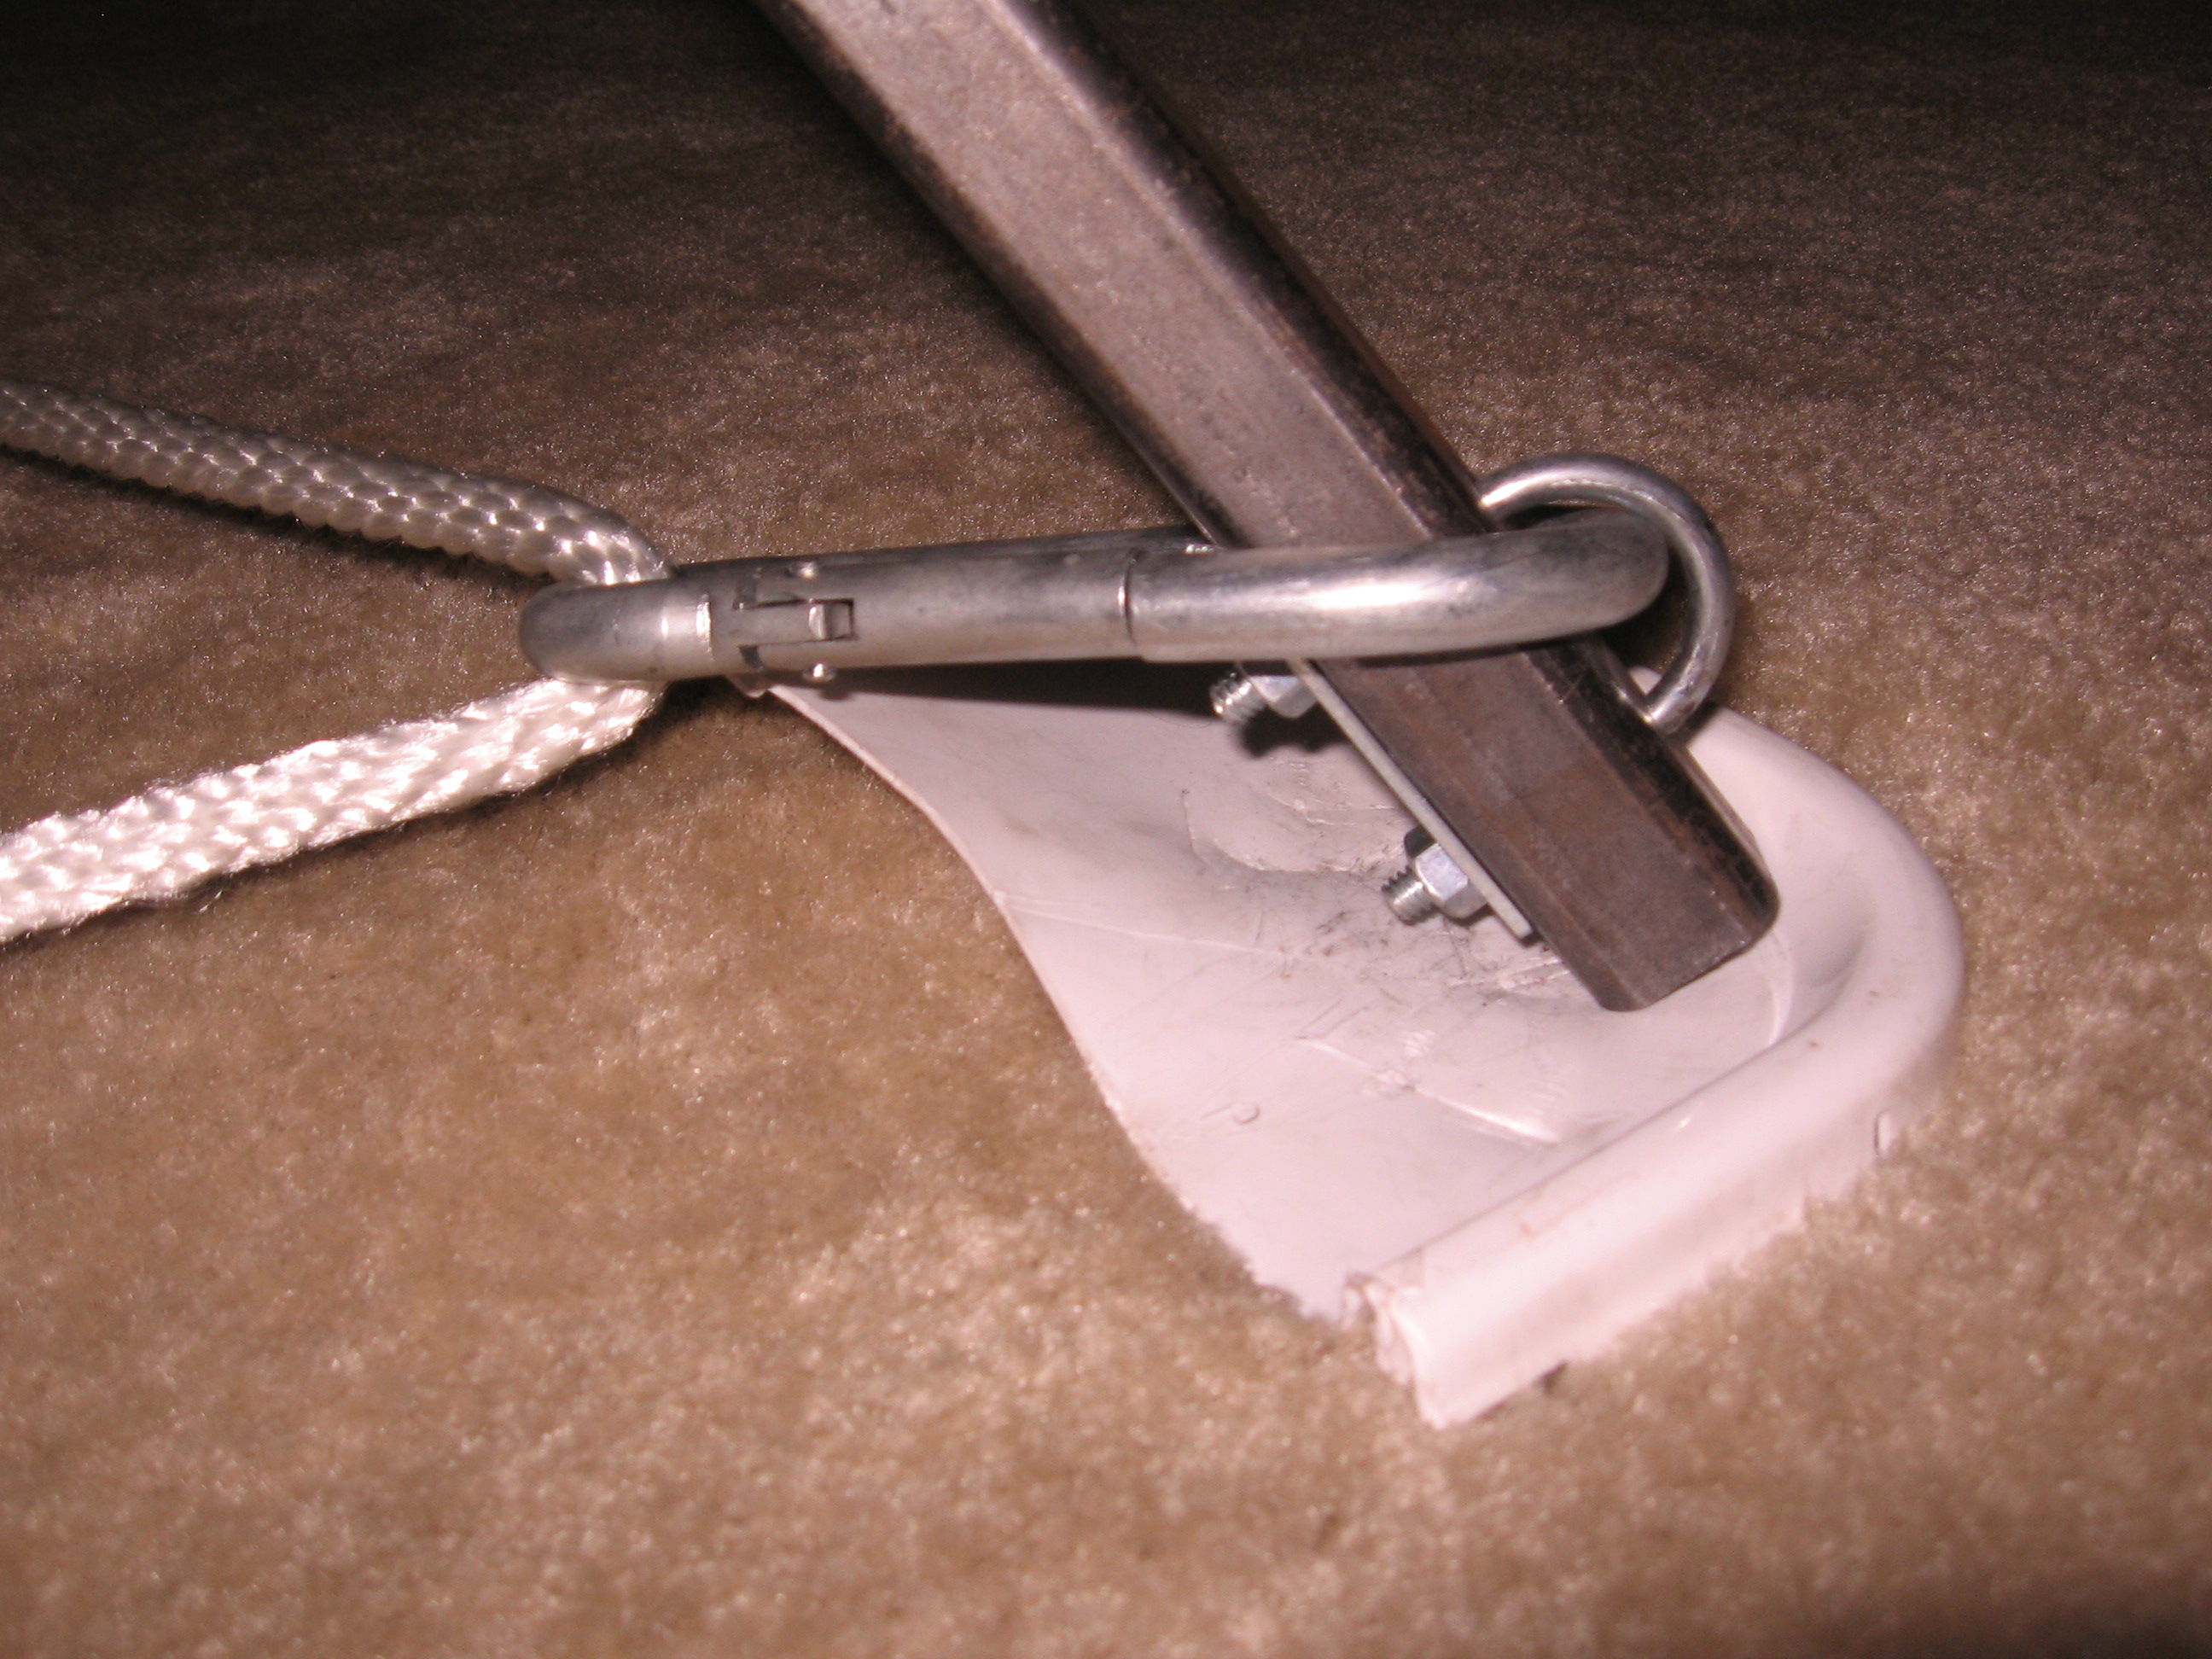
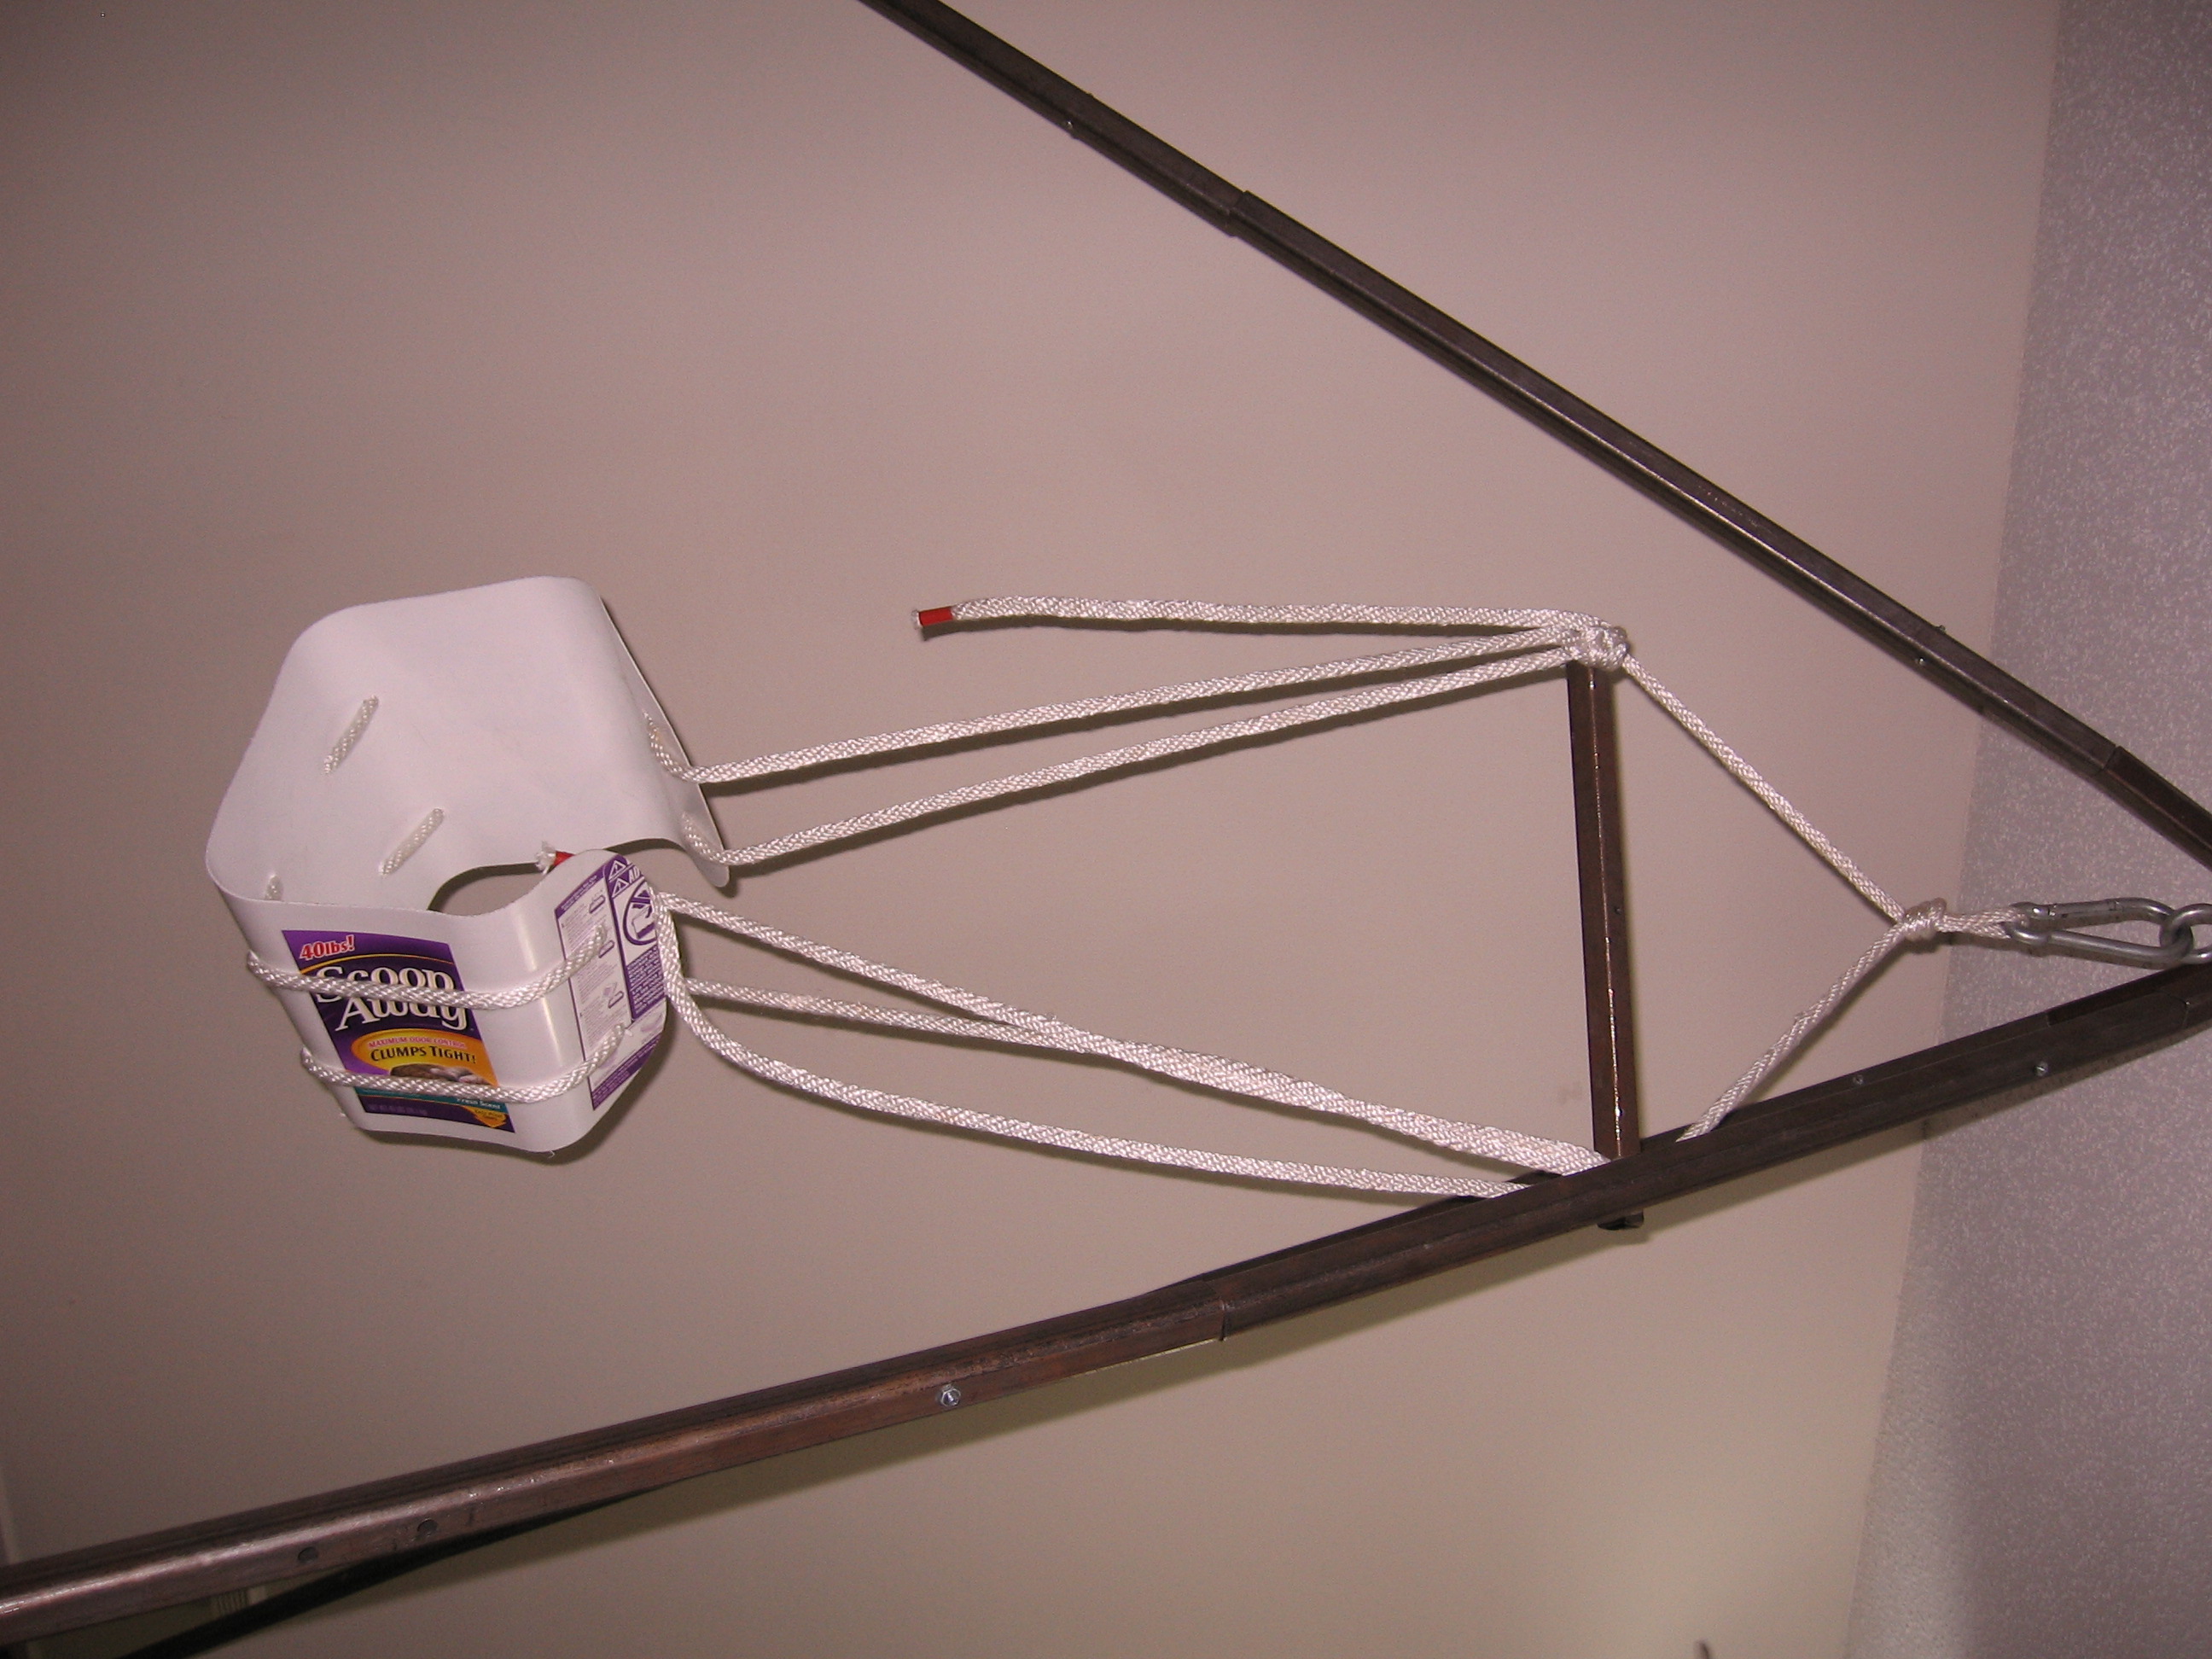
While the legs may look thin, this portable steel suspension frame was made from 1″ square steel tubing with 1/8″ thick walls, available in 20′ sections from your local steel yard, and is sturdy enough for me at 260lb to bounce up and down on as hard as I could without bending or breaking. It’s probably worth the extra few bucks to get the steel tubing cut to size when you get it. Each leg is made from 3 segments and is approximately 9′ long, with a .5′ section welded to the top plate. Each of the segments is connected to the segment above it with a 1′ long piece of solid steel 5/8″ bar stock. The bar stock sits on top of a nut and bolt in a hole 6′ from the top of the segment and is held in place by gravity and friction. At the foot of the bottom sections, two holes were drilled for a U bolt that holds a large carabiner in place. Heavy braided nylon rope is used to prevent the feet of the legs from spreading. The feet are in an equilateral triangle with 10′ sides. The central segment of one of the legs has two holes drilled in it so that the winch can be mounted to it. After the frame is set up and the legs are secured together, the winch is bolted into place, a first pulley is hooked into the top eye bolt along with the end of the steel cable. The second pulley is used for connecting to the load. Pieces of thick plastic, a cut up cat litter lid in this case, are put under the feet so that they don’t dig in, scratch up, etc. whatever surface you’re using.
The only part I was unable to make myself was the top segment. Unless you are very experienced in welding, I would advise cutting the pieces you need at the appropriate angles and visiting a machine shop that does welding. They should have a small thick piece of steel plate lying around, and should be able to make the few welds required fairly cheaply, and cleanly. Mine is a little messy because a friend with some experience stick welding helped me make it in a few minuets. Needless to say, I thoroughly tested the welds before I used the rig. I was able to drill the hole for the eye bolt. To drill the hole through the steel plate, I locked it down in my bench vice, then drilled it with successively larger diameter drill bits. The large ones are a pain, because they start skipping around. If you can, get the machine shop to drill the holes for you too. It’s worth saving the aggravation. As an aside, if while you’re getting supplies tell them it’s for a tripod for cooking over a fire. Since everything is steel, it could actually be used for this. Ideally I should be upgrading to a drop forged eye bolt as soon as I get by the local steel yard. I’ve used the open eye bolt pictured after thorough testing, but for my own piece of mind, I like going with overkill on anything where someone’s life is potentially on the line.
That’s about it really. Feel free to contact me with any questions that you have at evan@kinkycrafter.com.
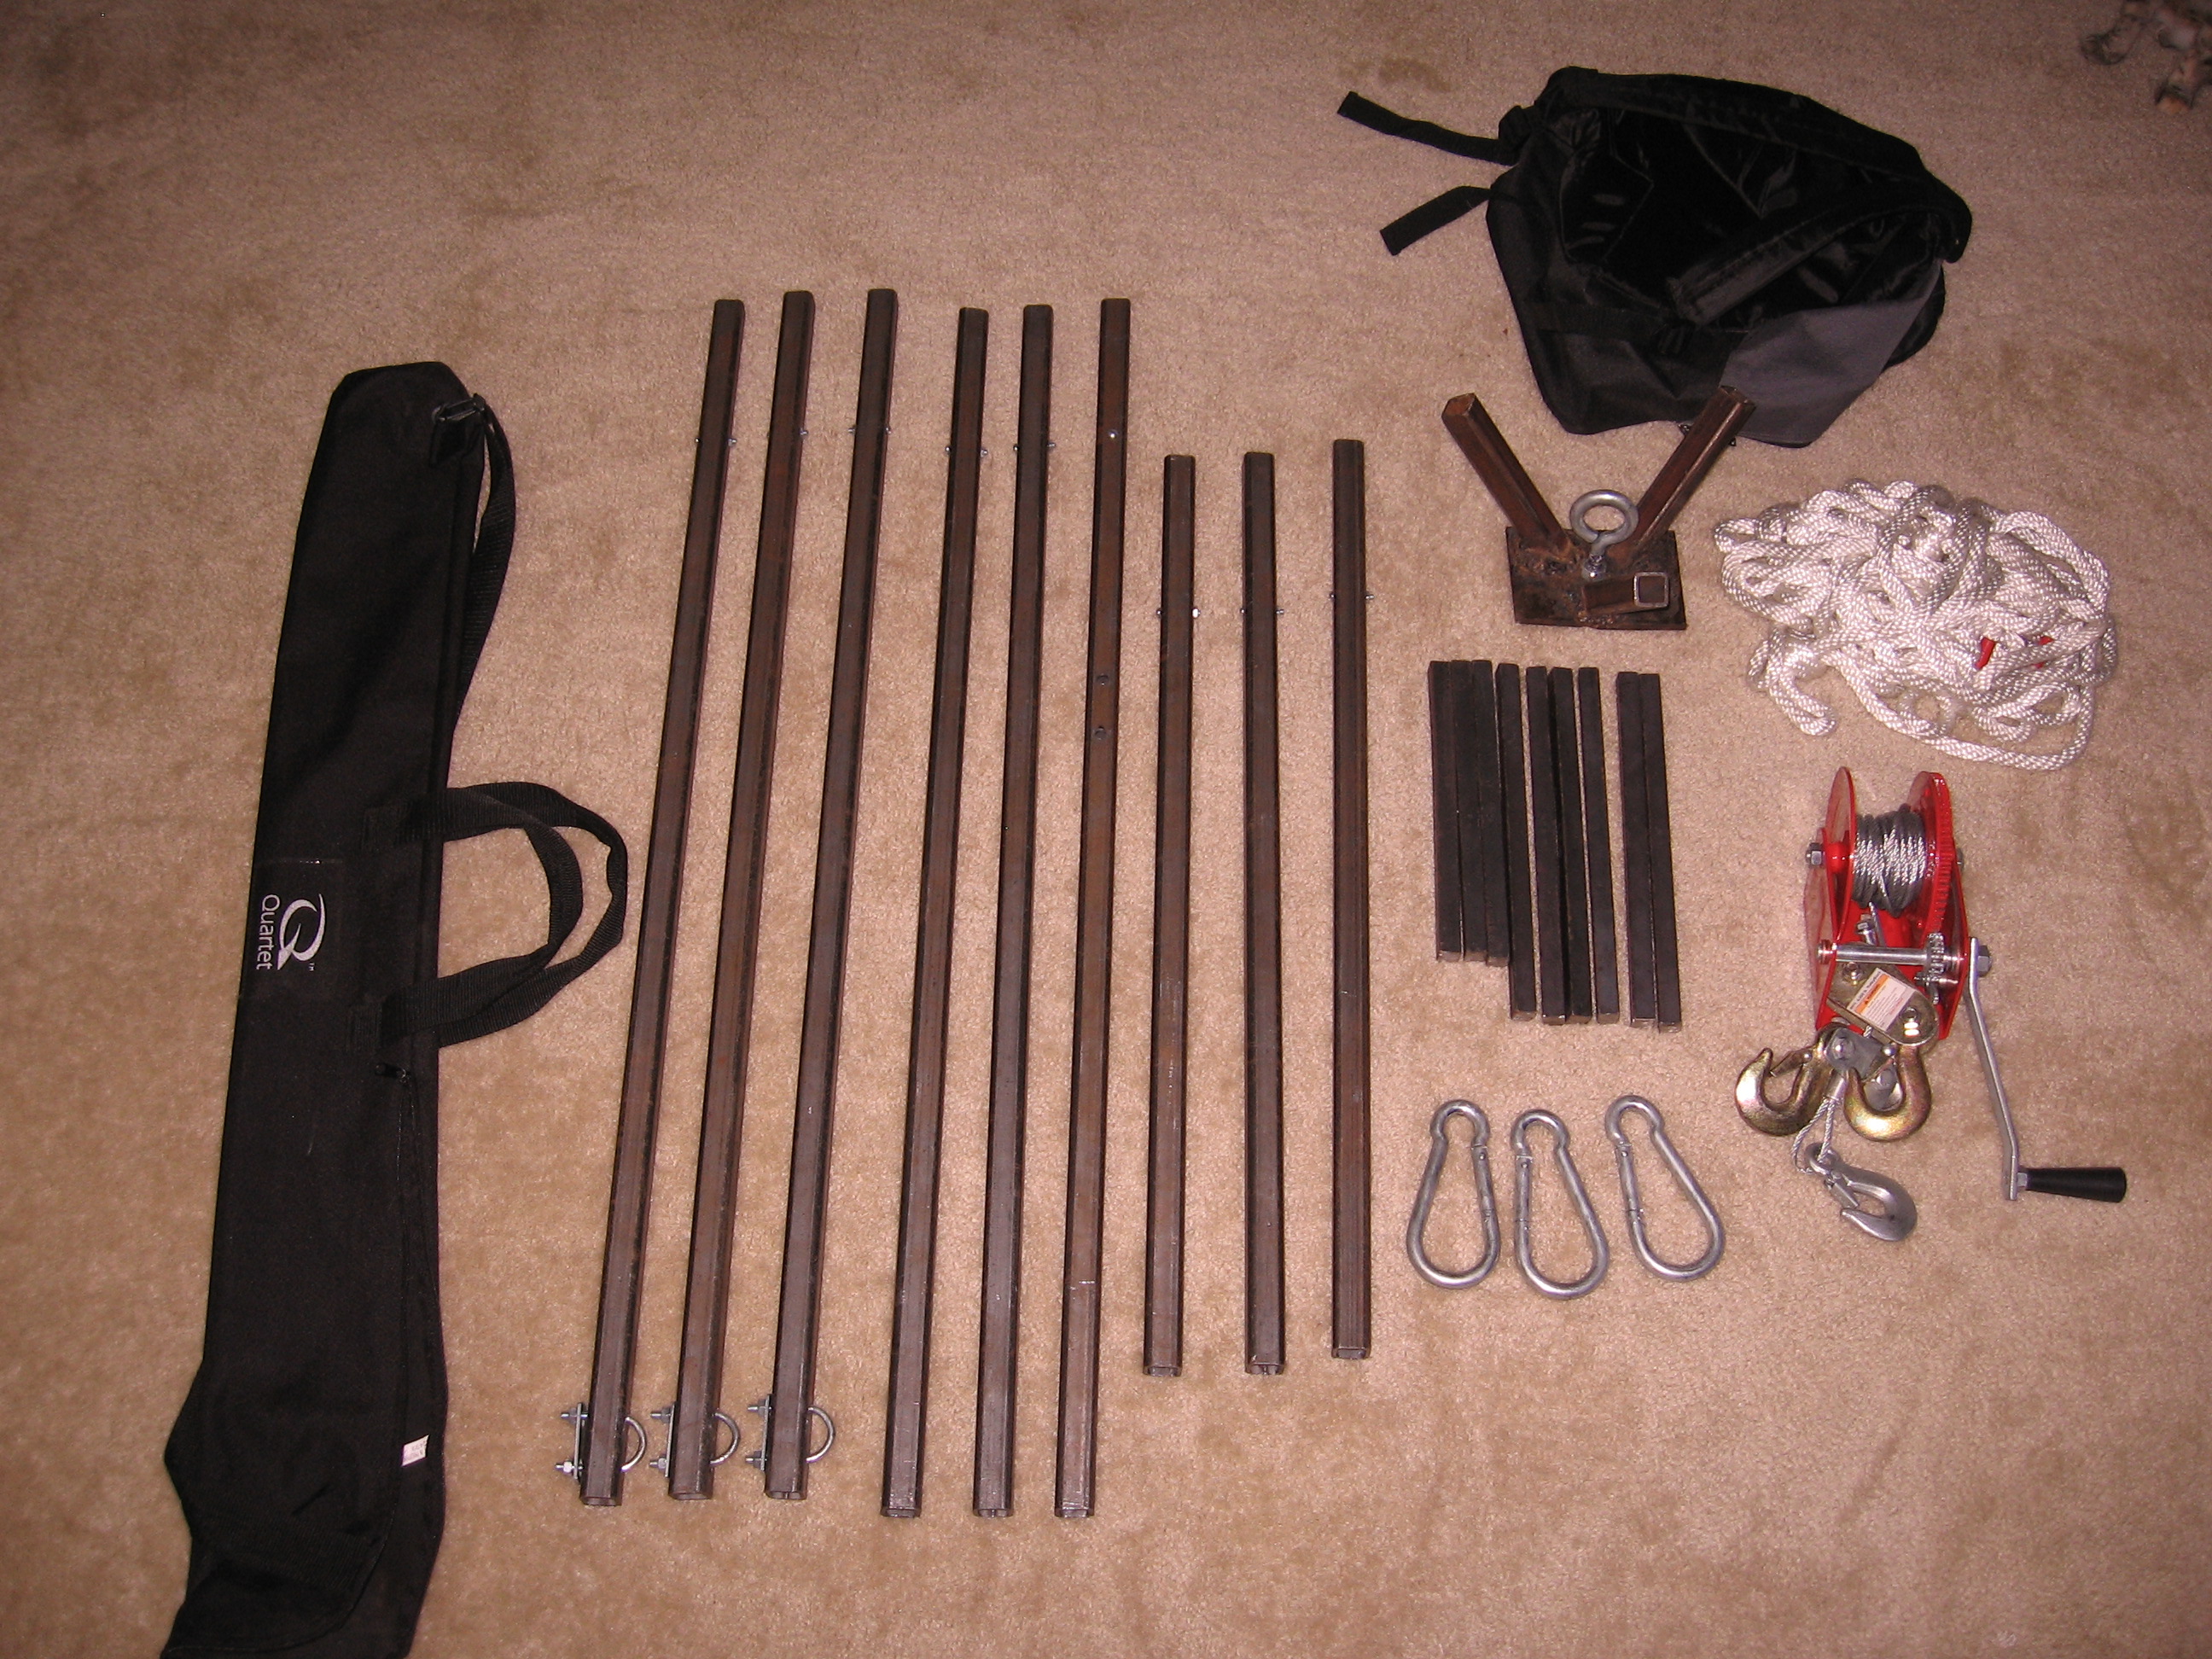
U bolts:
Bar stock, rope, carabiners, winch:
Tops piece:
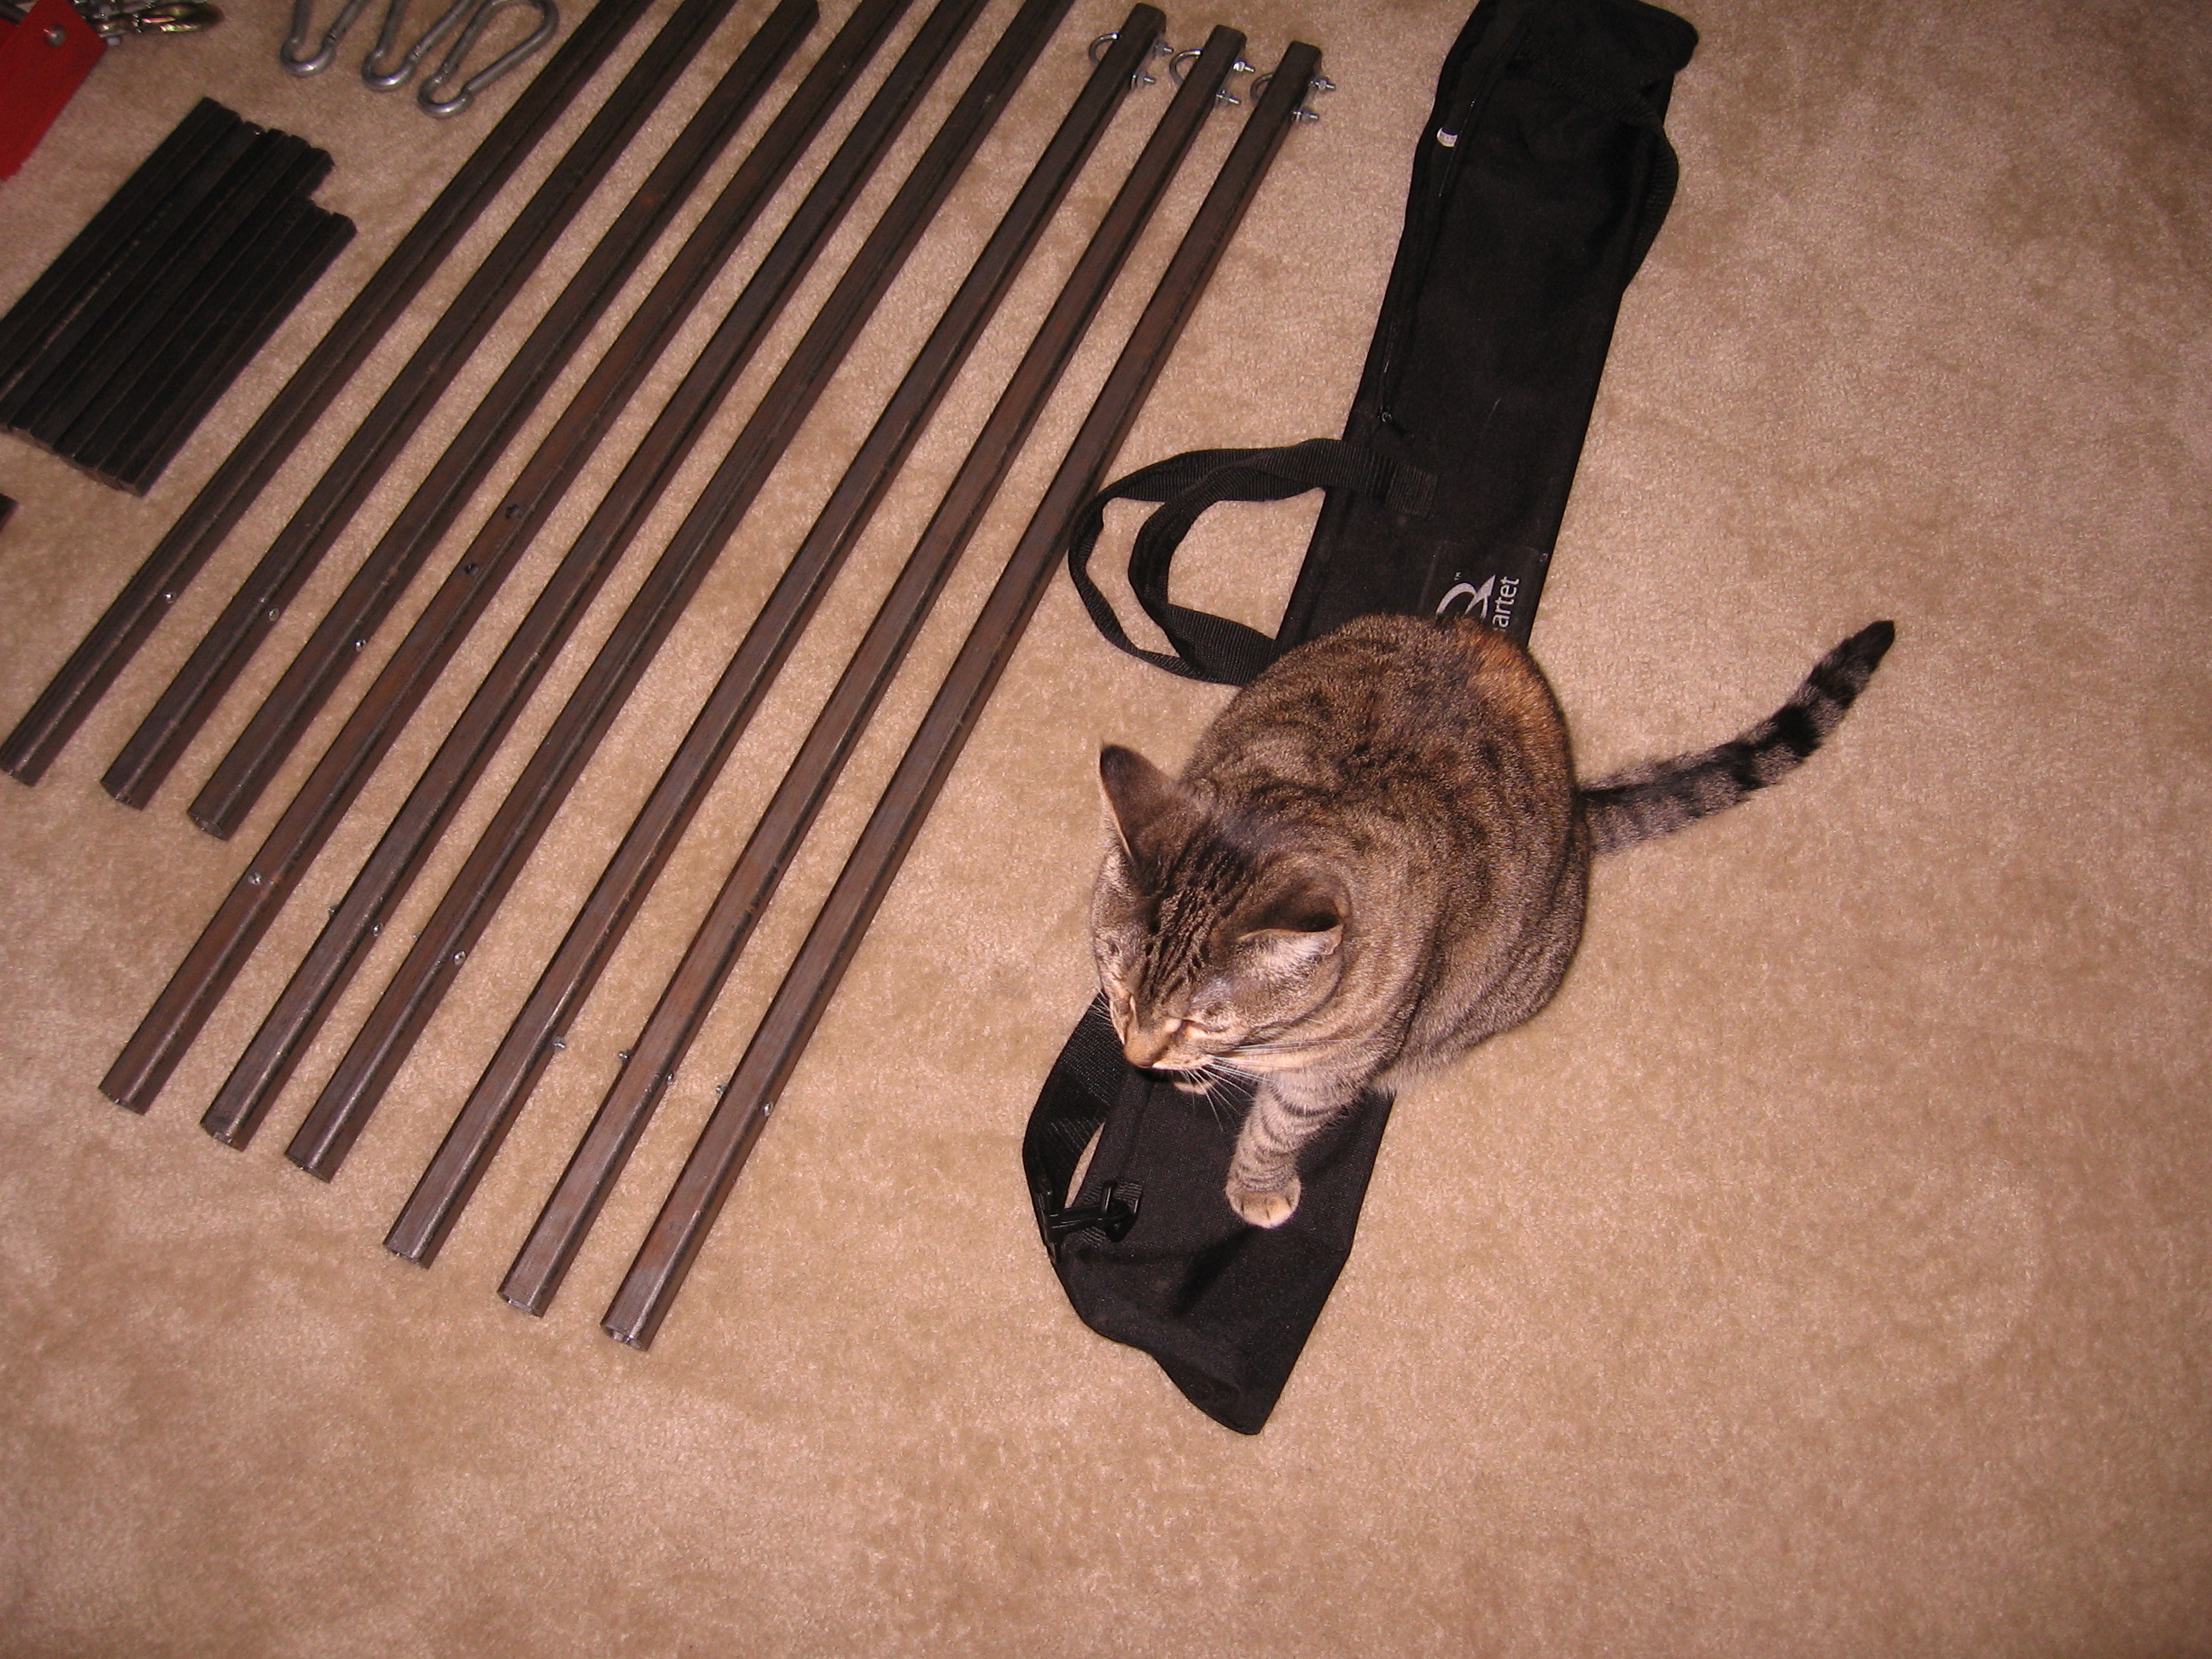
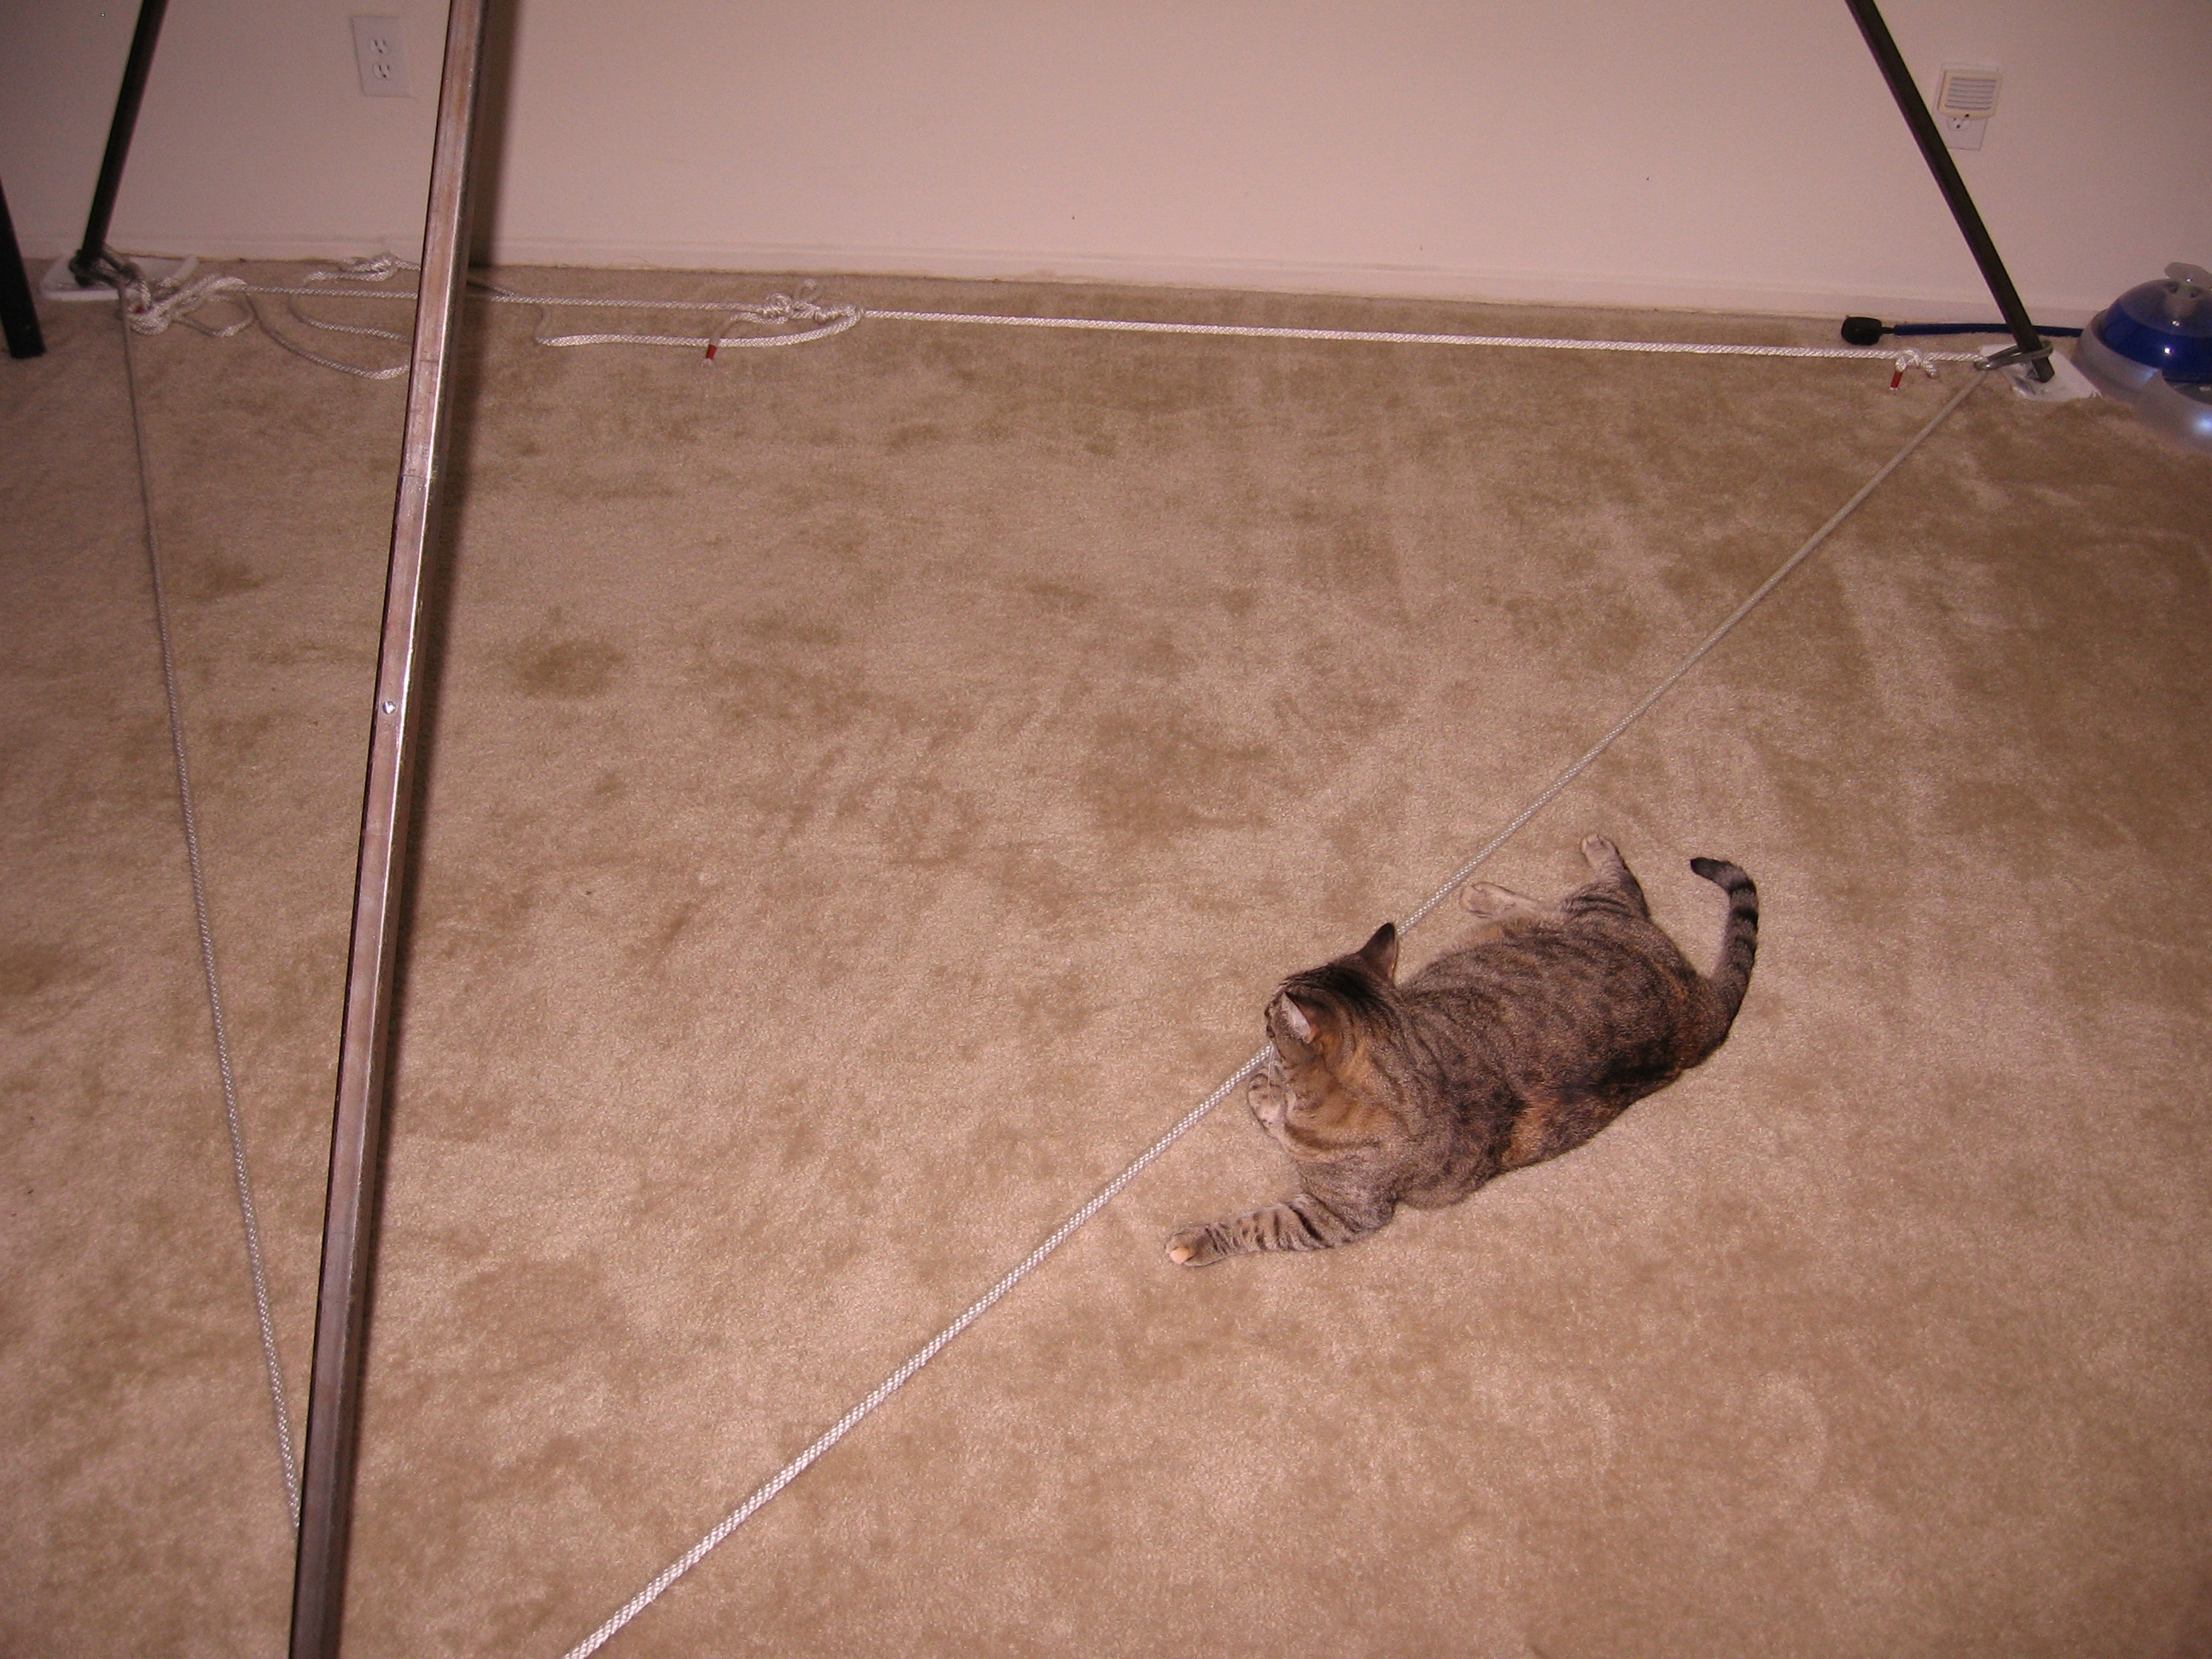
Helper cat:
First leg set up:
Two legs set up:
Rig set up with rope connecting feet:
Cable and pulleys:
Winch setup:

Cable and pulley attached to eye bolt:
Feet, carabiner, rope, and plastic ground protection:
Helper cat:

Load testing rig, which looks suspiciously like a swing made from some rope, a spreader bar, and a carved up litter container:
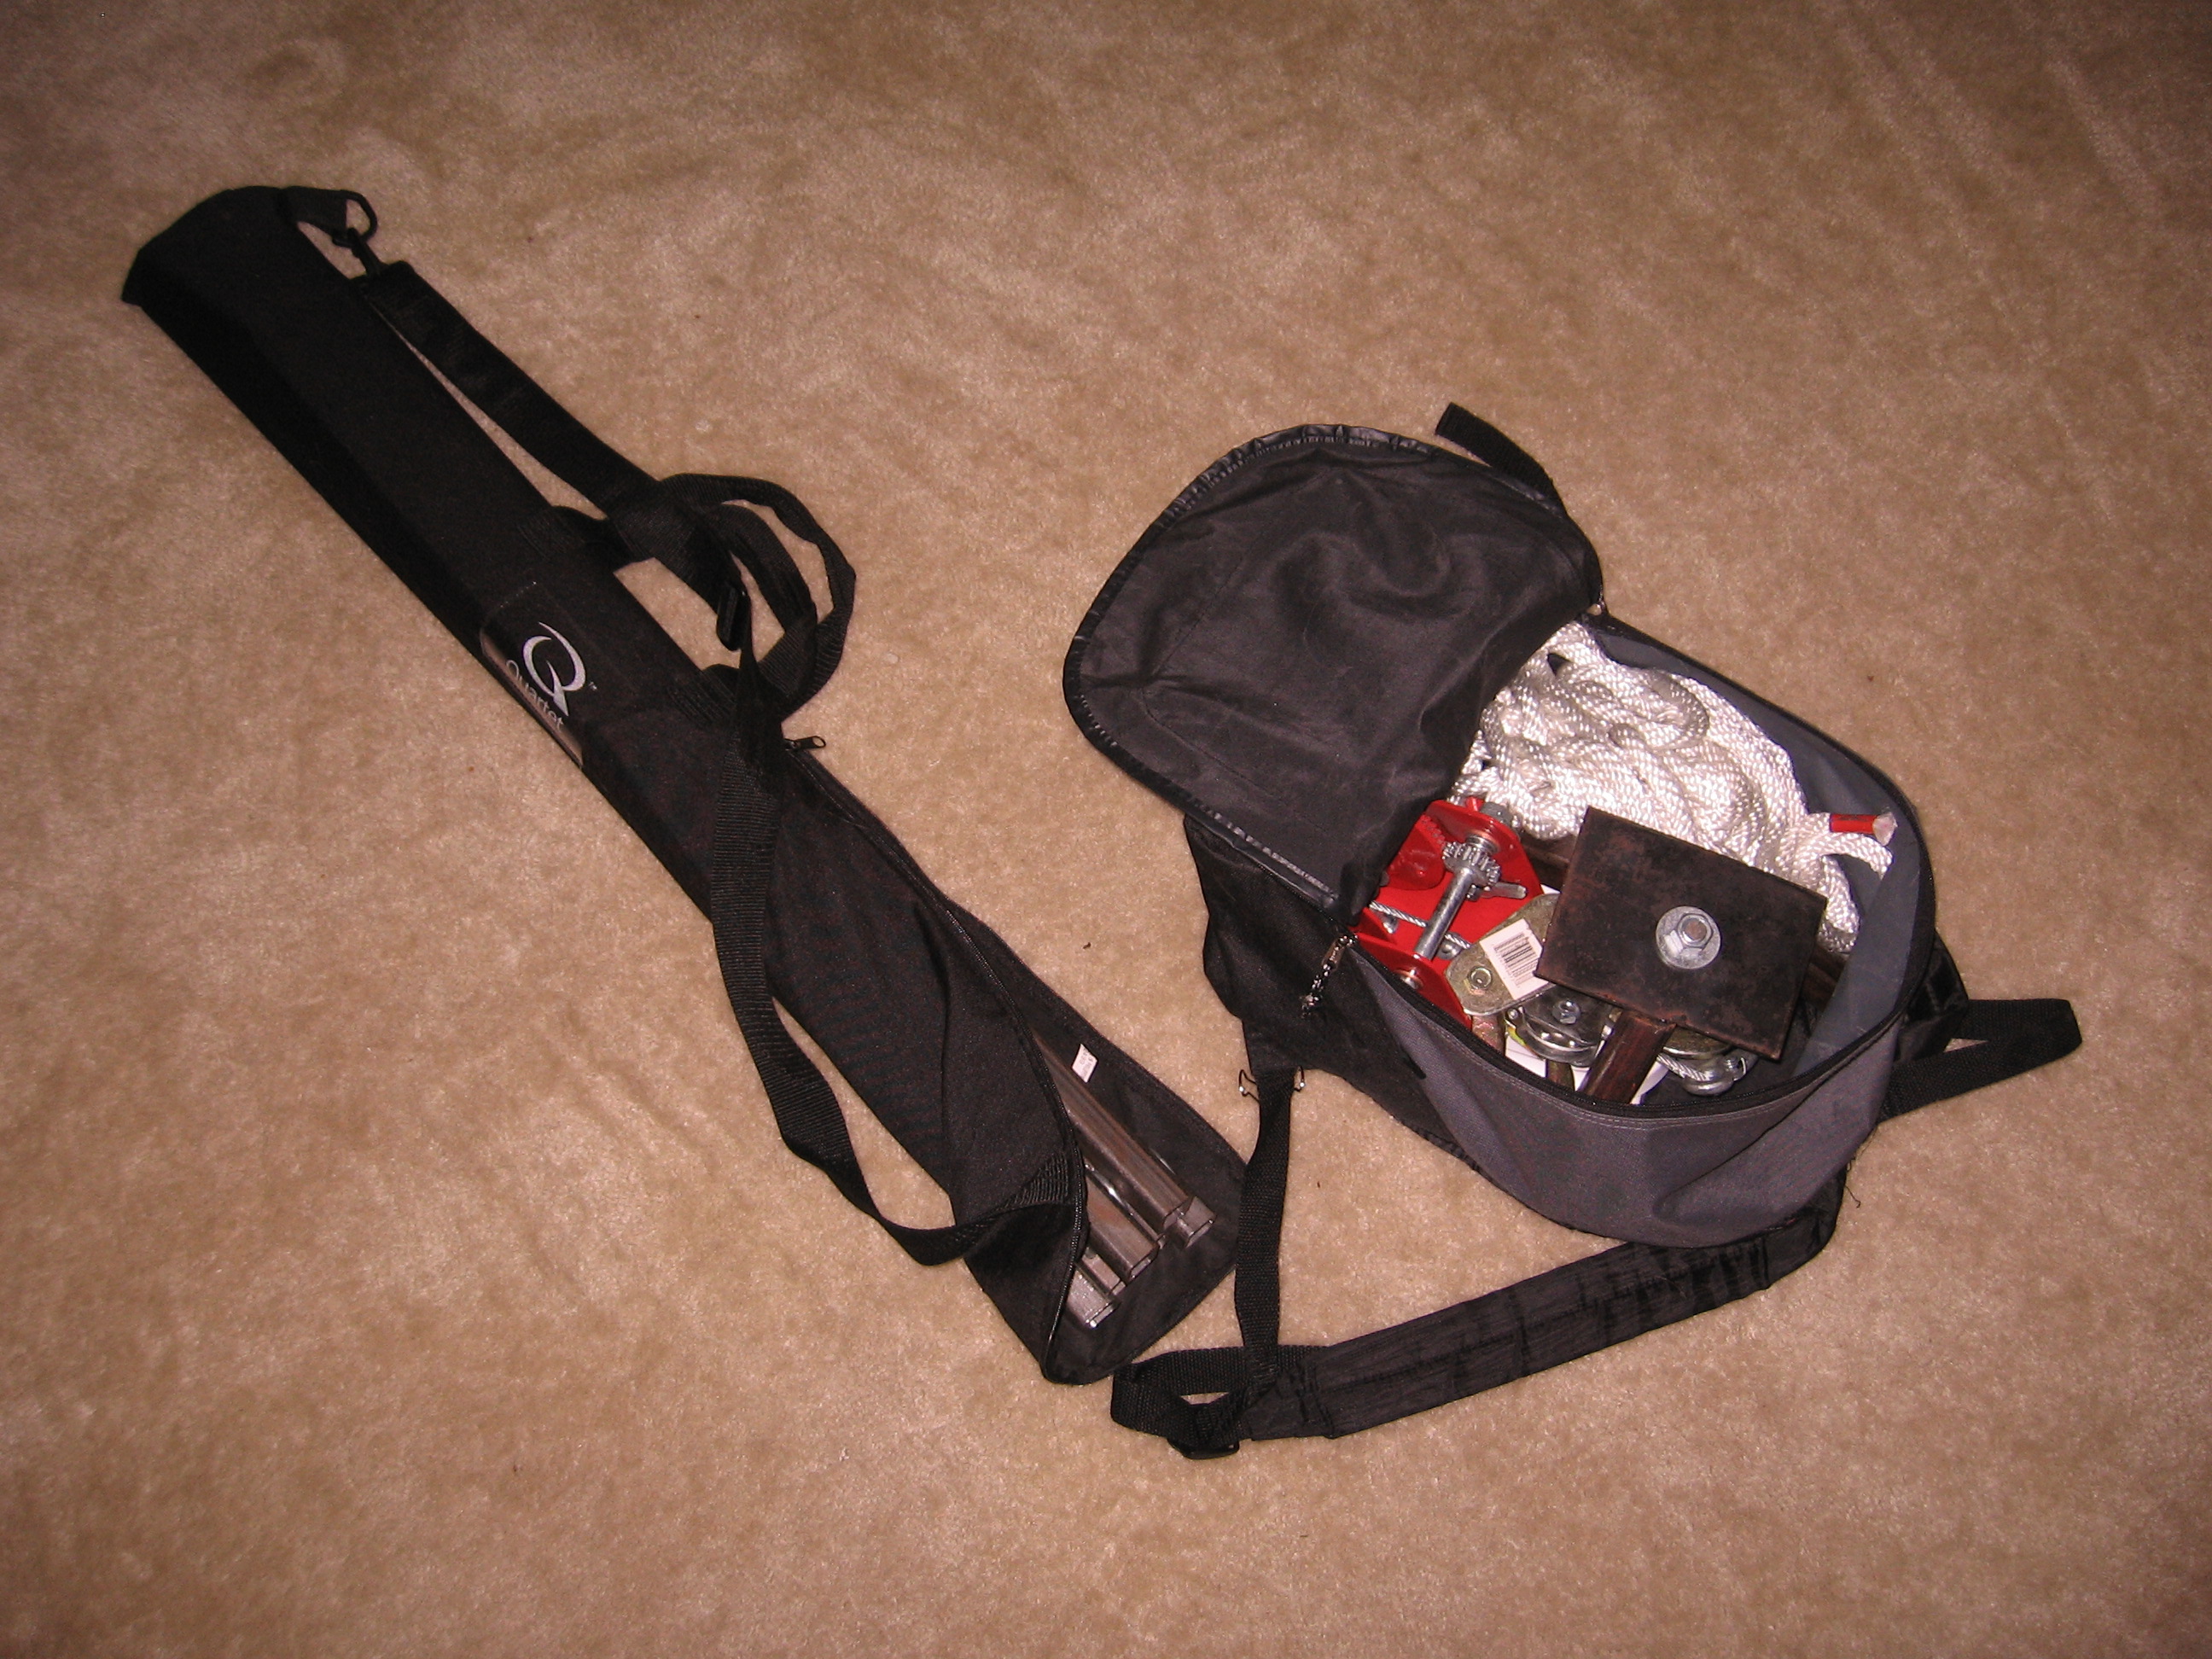
Everything all packed up:
Any questions?
 KinkyCrafter 20080515 - Portable suspension frame [ 23:50 ] Play Now | Play in Popup | Download (1058)
